Introduction
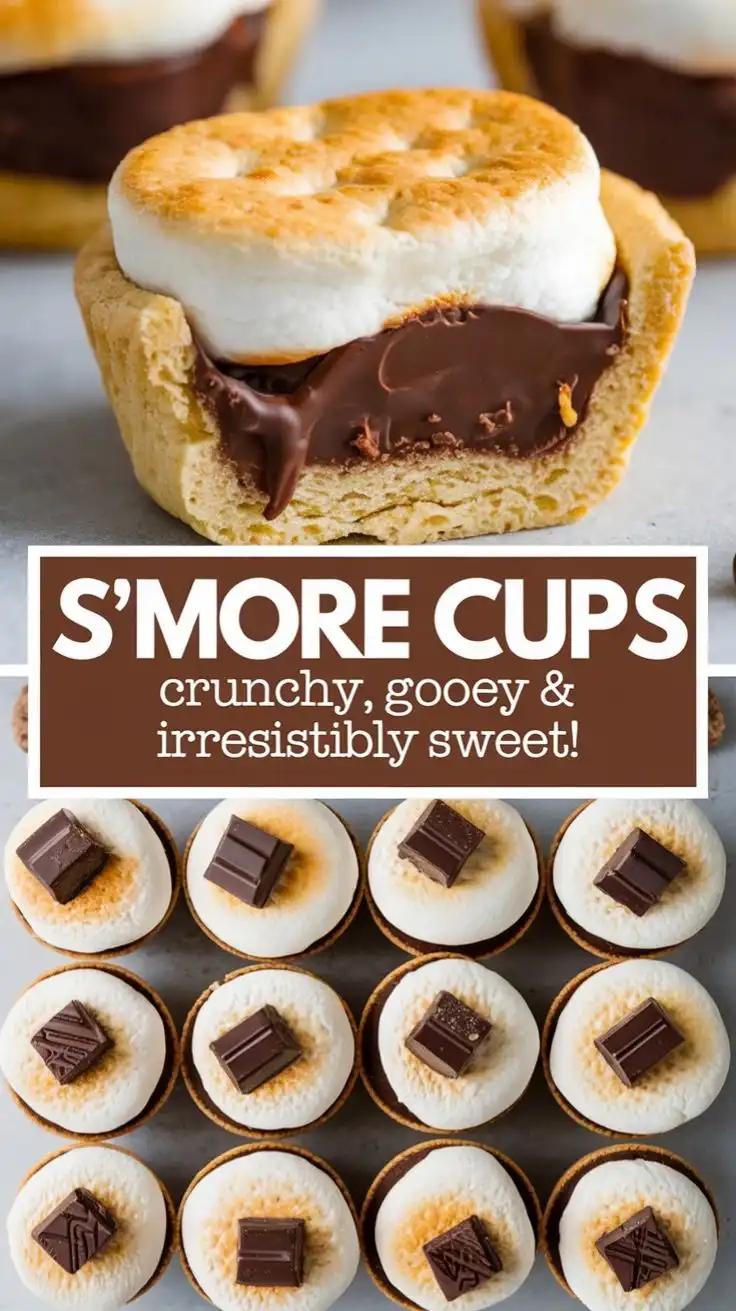
Welcome to the ultimate indulgence—S’more Cups! These miniature, no-bake masterpieces capture everything you love about the classic campfire treat in a perfectly portioned, mess-free, and utterly crave-worthy format. Imagine the nostalgic crackle of a bonfire, the rich aroma of toasted marshmallows, the deep cocoa notes of premium chocolate, and the satisfying crunch of graham cracker crust—all harmoniously layered into bite-sized, cup-shaped delights that are as photogenic as they are delicious. Whether you’re hosting a summer BBQ, packing school lunches, prepping for holiday cookie swaps, or simply treating yourself after a long day, S’more Cups deliver pure, unadulterated joy in every spoonful. They’re not just dessert—they’re edible nostalgia, reimagined with modern convenience and gourmet flair.
The History
The beloved s’more traces its roots back to the early 20th century, with its first documented appearance in the 1927 Girl Scouts handbook *Tramping and Trailing with the Girl Scouts*, where it was spelled “some more”—a playful nod to how impossible it is to eat just one. Originally crafted over open flames using only three humble ingredients (graham crackers, milk chocolate bars, and marshmallows), the s’more quickly became synonymous with outdoor adventure, childhood summers, and communal warmth. As home baking evolved, so did the s’more—inspiring countless riffs: s’more pies, s’more brownies, s’more pancakes, and even s’more lattes. The S’more Cup emerged in the mid-2010s as part of the broader “mini-dessert” movement, driven by social media’s obsession with aesthetically pleasing, portion-controlled treats. Food bloggers and pastry chefs began layering graham cracker crumbs, melted chocolate, and torched marshmallow fluff into silicone muffin cups—creating a portable, oven-free, and infinitely customizable version. Today, S’more Cups represent the perfect fusion of tradition and innovation: honoring the soul of the original while embracing modern techniques like blowtorch finishing, freeze-dried marshmallow dust, and artisanal chocolate tempering.
Ingredients Breakdown
Every exceptional S’more Cup begins with intentionality—each ingredient plays a distinct, non-negotiable role in building texture, flavor balance, and structural integrity:
- Graham Cracker Crumbs (Base Layer): Not just filler—the foundation. Whole-grain graham crackers lend subtle honeyed sweetness, gentle spice (cinnamon + nutmeg), and a crisp-yet-buttery crunch. Fine crumbs bind seamlessly with melted butter, creating a sturdy, slightly crumbly shell that contrasts beautifully with the soft layers above. Opt for unfrosted graham crackers for authentic flavor and optimal texture control.
- Unsalted Butter (Binder & Flavor Enhancer): Melted and cooled, it hydrates the crumbs without greasiness and amplifies the toasty, caramelized notes of the graham. Unsalted butter ensures precise control over sodium levels—critical when balancing sweet and savory undertones.
- High-Quality Semi-Sweet Chocolate (Middle Layer): The heart of the s’more. Look for 54–60% cacao chocolate with clean cocoa bean origin notes (e.g., Dominican Republic or Madagascar). Avoid chocolate chips—they contain stabilizers that inhibit smooth melting. Instead, use chopped chocolate bars or couverture for glossy, velvety melt and deep, rounded bitterness that cuts through sweetness.
- Marshmallow Fluff or Homemade Marshmallow Creme (Top Layer): Provides airy, pillowy sweetness and essential gooeyness. Store-bought fluff offers convenience and consistent viscosity; homemade versions (made with gelatin, sugar syrup, and egg whites) deliver superior stability, richer mouthfeel, and less artificial aftertaste. For vegan versions, aquafaba-based marshmallow creme works beautifully.
- Optional—but Highly Recommended—Finishing Touches: A light sprinkle of flaky sea salt (Maldon or fleur de sel) heightens all flavors and adds a luxurious textural counterpoint. Crushed roasted peanuts or toasted coconut can introduce nutty complexity, while a dusting of freeze-dried strawberry powder adds bright acidity to balance richness.
Step-by-Step Recipe
- Prepare the Graham Cracker Crust: In a food processor, pulse 1 ½ cups (150g) graham cracker squares (about 10 full sheets) until fine crumbs form—no large shards. Transfer to a medium bowl, add 6 tbsp (85g) melted unsalted butter and 2 tbsp (25g) granulated sugar, then stir vigorously with a spatula until all crumbs are evenly moistened and resemble wet sand. Pinch a small amount—if it holds together without crumbling, it’s ready.
- Press Into Cups: Line a standard 12-cup muffin tin with parchment paper liners (or use reusable silicone cups for easy release). Spoon 1 heaping tablespoon of crumb mixture into each cup. Use the flat bottom of a measuring cup or a small glass to firmly press down and compact the crumbs into an even ¼-inch-thick layer across the bottom and slightly up the sides. Chill uncovered for 15 minutes to set.
- Melt the Chocolate: Chop 8 oz (225g) high-quality semi-sweet chocolate into uniform ¼-inch pieces. Place in a heatproof bowl set over a saucepan of barely simmering water (double boiler method), ensuring the bowl doesn’t touch the water. Stir constantly with a silicone spatula until fully melted and glossy—about 3–4 minutes. Remove from heat, stir in 1 tsp (5g) neutral oil (like grapeseed or refined coconut) to improve fluidity and prevent seizing, then let cool slightly (1–2 minutes) before pouring.
- Layer the Chocolate: Carefully spoon or pour ~1 tablespoon of warm melted chocolate into each chilled crust cup. Tilt and rotate each cup gently to coat the bottom and sides evenly. Tap the tin lightly on the counter to release air bubbles and smooth the surface. Return to the refrigerator for 10 minutes—or until chocolate is firm but not cold—to lock in the base before adding the marshmallow layer.
- Prepare the Marshmallow Layer: If using store-bought fluff: scoop 1 cup (280g) into a piping bag fitted with a wide round tip (or use a resealable plastic bag with a ½-inch corner snipped off). If making homemade marshmallow creme: whip chilled aquafaba or egg white foam to stiff peaks, gradually stream in hot sugar syrup (220°F/104°C), then beat until cool, thick, and glossy (8–10 minutes total). Gently fold in 1 tsp vanilla extract and pinch of salt.
- Pipe & Torch: Pipe a generous 1½-inch-high dome of marshmallow onto each chocolate-coated cup—aim for a smooth, rounded peak. For professional results, use a kitchen torch: hold flame 3–4 inches away and move in slow, circular motions until the surface turns golden-brown with delicate caramelized blisters (15–25 seconds per cup). Do NOT over-torch—bitterness develops fast. Alternatively, broil on high for 30–60 seconds, watching closely.
- Chill & Set: Immediately place the tin in the refrigerator for at least 30 minutes—or preferably 2 hours—to allow full setting. This prevents the marshmallow from weeping and ensures clean, sharp layers when served.
- Serve & Enjoy: Gently peel back parchment liners or pop silicone cups from the tin. Serve chilled or at cool room temperature for ideal texture contrast. Garnish with flaky salt, crushed graham, or a drizzle of dark chocolate ganache just before serving.
Tips
- Crumb Consistency Is Key: Too coarse = crumbly base; too fine = pasty, dense crust. Pulse in 2-second bursts and check frequently. If your crumbs clump, they’re perfect. If they look dusty, add ½ tsp more melted butter.
- Chocolate Temperature Matters: Pour chocolate while still fluid but no longer hot (>115°F/46°C)—excess heat can melt the graham crust or cause the marshmallow to deflate. Let it cool 90 seconds off the double boiler.
- Torch Like a Pro: Always torch marshmallow immediately after piping, before chilling. Cold marshmallow won’t caramelize—it’ll just dry out. Keep a spray bottle of water nearby in case of accidental flare-ups.
- Prevent Marshmallow Weeping: Humidity is the enemy. Make S’more Cups on dry days, or add ¼ tsp cream of tartar to homemade marshmallow creme for extra stability. Store in an airtight container with parchment between layers.
- Texture Contrast Hack: For extra crunch, mix 1 tbsp finely crushed roasted almonds or pretzel pieces into the graham crumb mixture before pressing.
- No-Torch Option: Broil on high for 45 seconds—but rotate the tin halfway through and watch like a hawk. Or skip browning entirely and finish with a dusting of cocoa powder + cinnamon for rustic charm.
- Make-Ahead Magic: Crusts can be pressed and frozen for up to 3 weeks. Thaw 5 minutes before adding chocolate. Fully assembled cups keep refrigerated for 5 days or frozen (un-torched) for up to 3 weeks—torch just before serving.
Variations and Customizations
S’more Cups are a canvas for creativity—here are 12 thoughtfully developed variations, each balancing authenticity with inspired innovation:
- Classic Campfire: Traditional graham crust, 60% dark chocolate, torched marshmallow fluff, finished with Maldon salt.
- Double Chocolate: Add 2 tbsp unsweetened cocoa powder to graham crumbs; use dark chocolate + 1 tbsp espresso powder in melted layer.
- Maple-Bourbon: Replace butter with maple-infused brown butter; add 1 tsp bourbon + ½ tsp maple extract to marshmallow fluff.
- Peppermint Crunch: Fold ¼ cup crushed candy canes into marshmallow layer; top with white chocolate drizzle and crushed peppermints.
- Salted Caramel Swirl: Swirl 1 tsp thick salted caramel sauce into chocolate layer before chilling; add caramel bits to graham crust.
- Vegan Delight: Use vegan graham crackers, coconut oil instead of butter, dairy-free chocolate, and aquafaba marshmallow creme.
- Spiced Chai: Infuse melted butter with chai tea bags (steep 5 min, strain); add ½ tsp ground cardamom + ¼ tsp ginger to crumbs.
- Strawberry-Balsamic: Swirl balsamic reduction into marshmallow; top with freeze-dried strawberry dust and white chocolate curls.
- Peanut Butter Cup: Press ½ tsp creamy peanut butter into crust before chocolate; swirl PB into marshmallow layer.
- Coconut Toasted: Toast ¼ cup shredded coconut with graham crumbs; use dark chocolate + coconut milk in marshmallow creme.
- Espresso Affogato: Mix 1 tsp instant espresso into chocolate; top torched marshmallow with a tiny shot of cold brew.
- Kids’ Fun Pack: Skip torching; pipe rainbow marshmallow fluff, decorate with mini chocolate chips, sprinkles, and gummy bears.
Health Considerations and Nutritional Value
While S’more Cups are undeniably decadent—and meant to be enjoyed mindfully—they can be adapted for various dietary priorities without sacrificing soul-satisfying appeal. A standard S’more Cup (12 per batch) contains approximately:
- Calories: ~210–240 per cup (varies by chocolate % and added toppings)
- Total Fat: 12–14g (mostly unsaturated from cocoa butter and graham cracker oils)
- Sugar: 18–22g (naturally occurring lactose + sucrose; ~60% comes from marshmallow fluff)
- Carbohydrates: 26–29g (including 1g dietary fiber from whole-grain graham)
- Protein: 2–3g (minimal, but boosted with peanut butter or protein-enriched marshmallow options)
Nutrition Highlights: Dark chocolate contributes flavonoids linked to cardiovascular support and improved endothelial function. Graham crackers made with whole wheat provide trace B vitamins and magnesium. Marshmallow fluff is fat-free and low in sodium—though high in simple sugars.
Dietary Adaptations:
- Lower-Sugar: Swap marshmallow fluff for monk fruit–sweetened version; use 70%+ dark chocolate; reduce graham sugar to 1 tbsp.
- Gluten-Free: Use certified GF graham-style crackers (like Kinnikinnick or Pamela’s) and verify chocolate is GF-certified.
- Higher-Protein: Add 1 scoop unflavored collagen peptides or whey isolate to marshmallow creme pre-whipping.
- Refined Sugar–Free: Use date-sweetened graham crust, coconut sugar–infused chocolate, and monk fruit–based marshmallow.
- Allergen-Friendly: Nut-free (verify graham labels), soy-free (choose soy-free chocolate), dairy-free (vegan versions above).
Remember: Portion control is built-in with the cup format—making mindful enjoyment effortless. Pair with herbal tea or sparkling water to round out the experience.
Ingredients
- 1 ½ cups (150g) graham cracker crumbs (about 10 full sheets, unfrosted)
- 6 tablespoons (85g) unsalted butter, melted and slightly cooled
- 2 tablespoons (25g) granulated sugar
- 8 ounces (225g) high-quality semi-sweet chocolate (54–60% cacao), finely chopped
- 1 teaspoon (5g) neutral oil (grapeseed, refined coconut, or sunflower)
- 1 cup (280g) marshmallow fluff (store-bought or homemade)
- Flaky sea salt, for finishing (optional but recommended)
Directions
- In a food processor, pulse graham crackers into fine crumbs. Transfer to a bowl; stir in melted butter and sugar until fully combined and moistened. Press 1 heaping tablespoon firmly into each of 12 parchment-lined muffin cups. Chill 15 minutes.
- Melt chocolate with oil in a double boiler over low heat, stirring constantly until smooth and glossy. Cool 90 seconds off heat.
- Pour 1 tablespoon melted chocolate into each chilled crust. Tilt to coat evenly. Tap tin to level. Refrigerate 10 minutes until set.
- Fill a piping bag with marshmallow fluff. Pipe a tall, rounded dome onto each chocolate layer.
- Using a kitchen torch, carefully caramelize the marshmallow surface until golden-brown and blistered (15–25 sec/cup). Watch closely.
- Refrigerate assembled cups for at least 30 minutes—or ideally 2 hours—to fully set.
- Peel off parchment or remove from silicone cups. Sprinkle with flaky salt. Serve chilled or at cool room temperature.
FAQ
- Can I make these without a torch?
- Absolutely! Use your oven broiler on high for 30–60 seconds—place rack 6 inches below heating element and watch continuously. Or skip browning entirely and garnish with cocoa nibs and a dusting of cinnamon for visual appeal and depth.
- Why did my marshmallow layer collapse or weep?
- This usually occurs due to humidity, over-chilling before torching, or under-whipped marshmallow creme. Always torch immediately after piping—and never refrigerate marshmallow before browning. For humid climates, add ¼ tsp cream of tartar or ½ tsp cornstarch to your creme.
- Can I freeze S’more Cups?
- Yes—with caveats. Freeze un-torched cups for up to 3 weeks in an airtight container with parchment between layers. Thaw in fridge 20 minutes, then torch just before serving for optimal texture and color.
- What’s the best chocolate for melting?
- Couverture chocolate (e.g., Callebaut, Valrhona, Guittard) has higher cocoa butter content, yielding smoother melt and better sheen. Avoid chocolate chips—they contain wax and stabilizers that create grainy texture.
- My graham crust stuck to the liner—how do I fix this?
- Ensure butter is fully melted and well-incorporated—not pooled at the bottom. Press firmly and chill thoroughly before adding chocolate. Use high-quality parchment liners (not wax paper), or try silicone cups for guaranteed release.
- Can I make these gluten-free or vegan?
- Yes! Use certified gluten-free graham-style crackers (like Schär or Kinnikinnick), dairy-free chocolate, coconut oil instead of butter, and aquafaba-based marshmallow creme. Double-check all labels for hidden gluten or dairy derivatives.
- How far in advance can I prepare them?
- Crusts can be made and frozen up to 3 weeks ahead. Fully assembled, refrigerated cups last 5 days. For events, prep crusts and chocolate layers 1 day ahead; torch and finish the morning of serving.
- What tools do I really need?
- Food processor, double boiler (or heatproof bowl + saucepan), silicone spatula, 12-cup muffin tin, parchment liners or silicone cups, piping bag + tip (or plastic bag), and a kitchen torch (highly recommended—but broiler works in a pinch).
Summary
S’more Cups are the brilliant, bite-sized evolution of America’s most cherished campfire confection—combining the nostalgic trio of graham, chocolate, and marshmallow into an elegant, portable, and endlessly adaptable dessert experience.
With their crisp-crunchy base, luxuriously smooth chocolate middle, and dramatically torched, cloud-like crown, they deliver maximum sensory satisfaction in every single, irresistible cup—proving that sometimes, the sweetest memories come in the smallest, most perfectly engineered packages.