Introduction
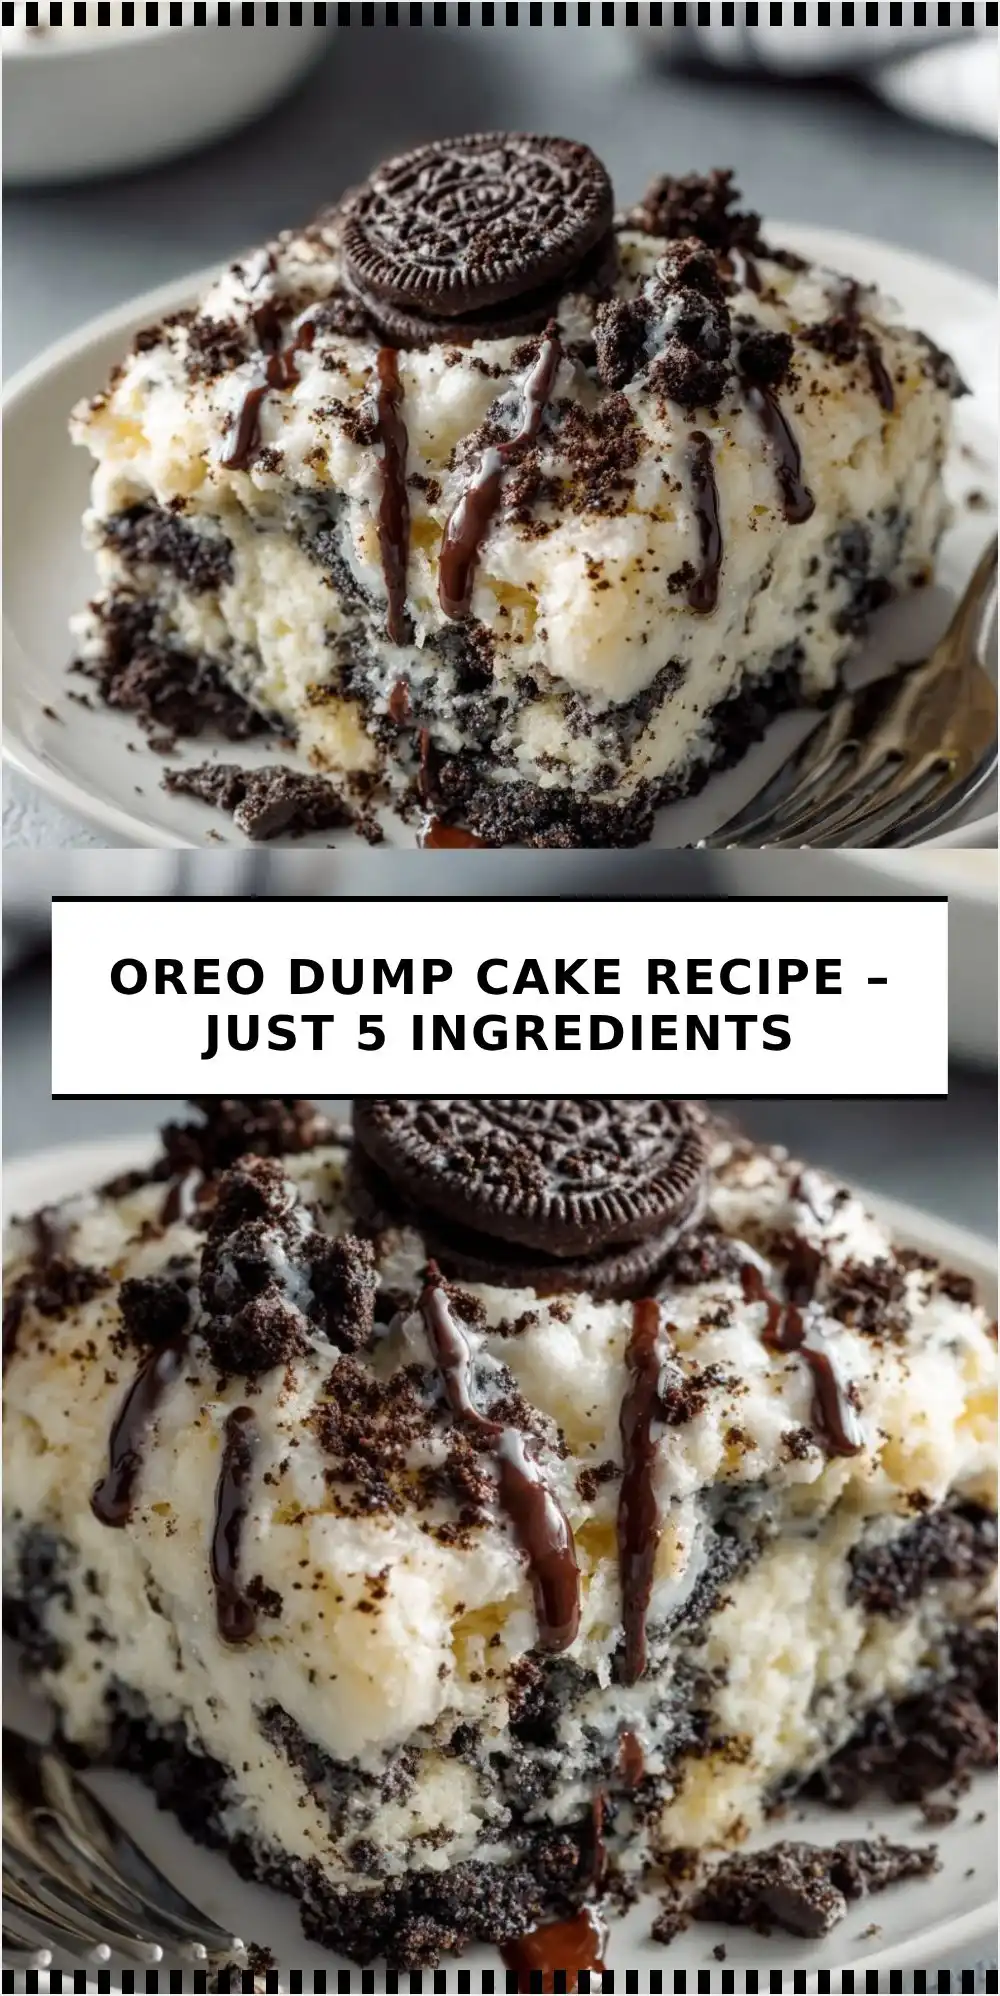
The Oreo Dump Cake is the ultimate no-fuss, crowd-pleasing dessert that embodies effortless elegance and nostalgic indulgence. Born from the beloved “dump cake” tradition—where ingredients are simply layered (not mixed) and baked to magical, self-saucing perfection—this version swaps fruit fillings for the iconic chocolate-and-cream magic of Oreos. It requires zero baking expertise, minimal prep time, and delivers maximum flavor: crisp, caramelized top; soft, gooey middle; and rich, cookie-infused depth in every bite. Whether you’re hosting last-minute guests, soothing post-work stress, or surprising kids after school, this 5-ingredient wonder proves decadence doesn’t demand complexity—it just needs Oreos, butter, and a little oven love.
The History
Dump cakes trace their roots to mid-20th-century American home kitchens, where resourceful bakers sought shortcuts without sacrificing satisfaction. Early versions appeared in community cookbooks and church pamphlets in the 1950s and ’60s—often using canned fruit, boxed cake mix, and melted butter layered directly in a pan and baked until bubbly and golden. The method capitalized on pantry staples and minimal cleanup, aligning perfectly with postwar domestic ideals of efficiency and comfort. While classic dump cakes leaned on cherry pie filling or peach slices, the Oreo iteration emerged organically in the late 2000s and early 2010s alongside the viral rise of “Oreo hacks” on food blogs and Pinterest. Home cooks began experimenting by crushing cookies into existing dump cake frameworks—and quickly discovered that Oreos’ proprietary cream filling transformed into a luscious, fudgy sauce when baked with butter, while the wafers softened into tender, cake-like layers. By 2015, #OreoDumpCake had amassed over half a million Instagram posts, cementing its status as a modern dessert phenomenon—a delicious fusion of retro technique and contemporary snack culture.
Ingredients Breakdown
This recipe proudly features only five whole-food-friendly (yet undeniably indulgent) ingredients, each playing a precise, irreplaceable role in texture, structure, and flavor:
- Oreo Cookies (36 regular-size, ~12 oz): Not just flavor—the foundation. The chocolate wafers provide structure and cocoa depth; the vanilla cream filling melts into a rich, custard-like layer that binds everything together. Use original Oreos (not Double Stuf or seasonal variants) for consistent moisture balance and optimal caramelization.
- Unsalted Butter (1 cup / 2 sticks / 227g, melted): Acts as both hydrator and leavening catalyst. Melting ensures even distribution, coating every crumb to prevent dryness and promoting golden-brown crust formation via Maillard reaction. Unsalted gives full control over sodium levels—especially important since Oreos already contain ~150mg sodium per serving.
- Granulated Sugar (½ cup / 100g): More than sweetness—it enhances browning, stabilizes the butter-cookie matrix, and balances the slight bitterness of cocoa. Reducing it below ⅓ cup risks a pale, greasy, under-caramelized result; exceeding ¾ cup may cause oversaturation and syrupy pooling.
- Whole Milk (½ cup / 120ml): The secret hydration agent. Unlike water, milk’s proteins and lactose contribute tenderness and nuanced browning. Its fat content emulsifies with melted butter, creating a cohesive batter-like consistency without stirring. Evaporated or condensed milk would overwhelm; skim milk lacks enough fat for ideal richness.
- Vanilla Extract (1 teaspoon, pure—not imitation): A subtle but critical aromatic lift. Pure vanilla enhances the cream filling’s sweetness and rounds out cocoa’s sharpness. Skip it, and the cake tastes flat and one-dimensionally sweet. Alcohol-based extract also aids in even distribution during layering.
Notably absent: flour, eggs, leaveners, baking powder, cocoa powder, or any pre-made cake mix—making this truly minimalist, pantry-driven, and gloriously un-fussy.
Step-by-Step Recipe
- Preheat & Prep: Position oven rack in center position. Preheat oven to 350°F (175°C). Generously grease a 9×13-inch metal or ceramic baking pan with unsalted butter or non-stick spray—ensure corners and edges are fully coated to prevent sticking during caramelization.
- Crush the Oreos (No Food Processor Needed!): Place 30 Oreos (reserve 6 for garnish) into a heavy-duty zip-top bag. Seal tightly, expelling excess air. Using a rolling pin, meat mallet, or sturdy bottle, crush cookies into fine, sandy crumbs—about the consistency of coarse sand with occasional pea-sized pieces (do not pulverize into dust; texture matters!). Transfer crumbs to a large bowl.
- Layer Dry Ingredients: Evenly spread crushed Oreos across the bottom of the prepared pan in a uniform ¼-inch-thick layer. Gently press down with fingertips to create a compact, level base—this prevents uneven sinking later.
- Add Wet Ingredients in Precise Order: Drizzle melted butter evenly over the crumb layer. Next, sprinkle granulated sugar in an even blanket—do not stir or mix. Then pour milk slowly in a thin stream over the sugar, allowing it to seep through naturally. Finally, add vanilla extract in a single stream across the center.
- Top with Whole Oreos: Arrange the remaining 6 whole Oreos, cream-side-up, evenly spaced across the surface—like edible “islands.” This creates visual appeal and adds textural contrast: crisp edges on top, soft centers beneath.
- Bake with Strategic Timing: Place pan in preheated oven. Bake uncovered for exactly 42–45 minutes. At 30 minutes, check for bubbling around edges and light golden color. At 42 minutes, the top should be deeply bronzed with visible cracks and a glossy, slightly syrupy sheen. Do not open the oven before 38 minutes—steam retention is essential for proper setting.
- Cool & Set (Non-Negotiable Step): Remove from oven and place pan on a wire cooling rack. Let cake cool completely—minimum 90 minutes at room temperature. This allows residual heat to finish cooking the center, butter to re-emulsify, and the creamy layer to thicken into sliceable, fudgy perfection. Cutting too soon yields soupy, crumbly results.
- Serve: Cut into 12 generous squares using a hot, clean knife (dip blade in hot water and wipe between cuts). Serve at room temperature or slightly warmed. Optional: a scoop of high-quality vanilla bean ice cream or a dusting of flaky sea salt elevates contrast beautifully.
Tips
- Room-Temperature Ingredients Matter: Ensure butter is fully melted *and cooled slightly* (warm to touch, not hot)—scalding butter can prematurely melt Oreo cream, causing greasiness. Milk should be cold—this temp contrast helps stabilize the layers during initial bake.
- Crumb Consistency Is Key: Too fine = dense, pasty cake. Too chunky = uneven baking and crumbly texture. Aim for “wet sand”—if unsure, pulse crushed cookies 3x in a blender, then sift out ultra-fine dust.
- Pan Choice Impacts Results: Dark non-stick pans bake faster and yield darker crusts—reduce time by 3–5 minutes. Light-colored metal or stoneware provides most reliable, even browning. Avoid glass—it retains heat too aggressively and may overbake edges.
- No Stirring, Ever: Resist the urge to mix or swirl. The magic lies in the distinct strata: crumb base → butter barrier → sugar “glue” → milk hydration → vanilla infusion → whole-cookie crown. Stirring destroys this architecture.
- Altitude Adjustment: Above 3,000 ft? Add 1 tbsp extra milk and increase bake time by 5–7 minutes—lower air pressure slows evaporation and setting.
- Make-Ahead Friendly: Assemble up to 12 hours ahead—cover tightly with plastic wrap and refrigerate. Bring to room temp 30 minutes before baking. Baked cake keeps covered at room temp for 2 days or refrigerated for 5 days—reheat individual squares at 325°F for 8 minutes.
Variations and Customizations
While the core 5-ingredient version is sacred, thoughtful tweaks preserve integrity while expanding versatility:
- Double Chocolate Boost: Add 2 tbsp unsweetened cocoa powder to crushed Oreos before layering—enhances depth without altering ratios. Pair with dark chocolate shavings sprinkled on top pre-bake.
- Peppermint Swirl: After pouring milk, drizzle 2 tsp pure peppermint extract over surface and gently swirl *once* with a toothpick—creates elegant marbling without mixing.
- Sea Salt Caramel Accent: Before baking, dot surface with 3 tbsp thick, store-bought salted caramel sauce (avoid runny varieties). Creates luxurious ribbons in the creamy layer.
- Gluten-Free Adaptation: Use certified GF Oreos (e.g., Kinnikinnick or Glutino brand) and verify butter/sugar/vanilla are GF-certified. Texture remains identical—no substitutions needed.
- Mini Individual Cakes: Divide layers among 6 greased 6-oz ramekins. Bake at 350°F for 28–32 minutes. Perfect for portion control or elegant dinner parties.
- Vegan Version (Still 5 Ingredients): Swap Oreos (check label—original are vegan!), use plant-based butter (Miyoko’s or Earth Balance), organic cane sugar, unsweetened almond milk, and alcohol-free vanilla. Results are indistinguishable in taste and texture.
- Streusel Upgrade: Mix reserved 6 Oreos with 2 tbsp melted butter and 1 tbsp brown sugar; crumble over top before baking for a crunchy, spiced crown.
Health Considerations and Nutritional Value
Per standard serving (1/12th of recipe):
- Calories: ~320 kcal
- Total Fat: 18g (11g saturated, 0.5g trans—naturally occurring from cocoa butter)
- Carbohydrates: 39g (28g sugars, primarily from Oreos and added sugar)
- Protein: 2.5g (minimal; from milk and cookie flour)
- Sodium: 210mg (moderate—well below daily limit of 2,300mg)
- Fiber: 0.8g (low, due to refined ingredients)
Key Notes:
- This is intentionally a dessert, not a health food—but it avoids common pitfalls: no artificial preservatives, hydrogenated oils, or high-fructose corn syrup (original Oreos contain canola oil and real sugar).
- The absence of flour and eggs makes it naturally gluten-free *if using GF Oreos*, and suitable for many egg-allergic individuals.
- Portion control is the healthiest strategy: serve modest 3″x3″ squares alongside fresh berries or lightly sweetened whipped cream to balance richness.
- Nutritionally, it offers small amounts of calcium (from milk), iron (from cocoa), and B vitamins (from enriched flour in Oreos)—but shouldn’t be relied upon for micronutrient intake.
- For reduced sugar: substitute ¼ cup monk fruit blend + 2 tbsp sugar (maintains browning); expect slightly paler crust and less viscous sauce.
Ingredients
- 36 regular original Oreo cookies (12 oz package), divided
- 1 cup (2 sticks / 227g) unsalted butter, melted and slightly cooled
- ½ cup (100g) granulated sugar
- ½ cup (120ml) whole milk
- 1 teaspoon pure vanilla extract
Directions
- Preheat oven to 350°F (175°C). Grease a 9×13-inch baking pan with butter or non-stick spray.
- Crush 30 Oreos into fine, sandy crumbs (use a zip-top bag and rolling pin). Spread evenly in prepared pan and press gently to compact.
- Drizzle melted butter evenly over crumbs. Sprinkle sugar evenly over butter. Pour milk slowly over sugar. Add vanilla extract in a single stream.
- Arrange remaining 6 whole Oreos, cream-side-up, evenly across surface.
- Bake uncovered for 42–45 minutes, until top is deeply golden, edges bubble, and center is set (a toothpick inserted near center should come out with moist crumbs—not wet batter).
- Cool completely on a wire rack—minimum 90 minutes—before cutting.
- Cut into 12 squares with a hot, clean knife. Serve at room temperature.
FAQ
- Can I use Double Stuf Oreos?
- No—they contain more cream filling and less structural wafer, leading to excessive greasiness, poor layer definition, and potential sinking. Stick with original for reliability.
- Why does my cake look greasy or separated?
- Most often caused by: butter too hot when poured (melts cream prematurely), skipping the cooling step (cutting too soon), or using low-fat milk (lacks emulsifying fat). Also ensure Oreos are fresh—stale cookies absorb butter unevenly.
- Can I make this ahead and freeze it?
- Baked cake freezes well for up to 3 months: wrap tightly in plastic + foil, thaw overnight in fridge, then warm at 325°F for 12 minutes. Unbaked assembled cake should not be frozen—milk separates and Oreos soften unpredictably.
- What if I don’t have a 9×13 pan?
- A 10×15 jelly roll pan works—reduce bake time by 5–7 minutes. An 8×8 pan will yield thicker, denser bars—add 8–10 minutes to bake time and check frequently. Avoid round pans—they disrupt even heat distribution.
- Is there a way to reduce sweetness without ruining texture?
- Yes—swap ¼ cup sugar for 2 tbsp erythritol + 1 tbsp sugar. Do not omit sugar entirely: it’s vital for browning, moisture retention, and structural integrity. Also try flaky sea salt on top pre-bake to enhance perceived sweetness.
- Can I add nuts or fruit?
- Technically yes—but it breaks the “5-ingredient” purity and risks texture imbalance. If desired, fold ½ cup toasted pecans into crushed Oreos *before* layering—adds crunch without compromising structure. Avoid fruit: excess moisture causes sogginess.
- Why did my top burn but center stay jiggly?
- Oven running hot—calibrate with an oven thermometer. Also, dark pans accelerate browning; next time, tent loosely with foil at 35 minutes. Never increase temperature to “speed up” baking—it ruins the delicate layer chemistry.
Summary
The Oreo Dump Cake is a masterclass in minimalist baking: five humble ingredients transform—without mixing—into a luxuriously textured, deeply nostalgic dessert with a crackling caramelized top, tender fudgy center, and rich chocolate-vanilla harmony.
Effortless to assemble, endlessly adaptable, and reliably impressive, it proves that extraordinary flavor doesn’t require complexity—just quality Oreos, patience to cool, and the quiet confidence that sometimes, the best desserts are the ones you simply “dump and done.”