Christmas Cookie Board or Dessert Charcuterie: A Festive Celebration of Sweet Flavors
The holiday season is a time for joy, connection, and indulgence—especially when it comes to food. One trend that has taken the festive world by storm is the Christmas Cookie Board, also known as a Dessert Charcuterie Board. Inspired by the savory charcuterie boards filled with meats, cheeses, and crackers, this sweet counterpart brings together an artful arrangement of cookies, candies, chocolates, fruits, dips, and other delightful treats into a visually stunning centerpiece perfect for holiday gatherings, family events, office parties, or cozy nights by the fire.
The History of the Christmas Cookie Board
While the tradition of baking Christmas cookies dates back centuries—with roots in German spice cookies like Lebkuchen and Scandinavian gingerbread—the concept of the dessert charcuterie board is a modern twist on a classic idea. Charcuterie itself originated in France as a way to preserve and serve cured meats. Over time, the idea evolved into beautifully arranged platters showcasing a variety of textures and flavors.
In the 2010s, social media platforms like Pinterest and Instagram popularized the aesthetic appeal of food presentation, leading to the rise of “sweet charcuterie” or dessert boards. The Christmas Cookie Board emerged as a festive version of this trend, combining seasonal favorites into one shareable, photogenic display. It’s not just about taste—it’s about creating an experience, encouraging guests to explore different textures, temperatures, and flavor combinations in a fun and interactive way.
Ingredients Breakdown: Building a Balanced and Beautiful Board
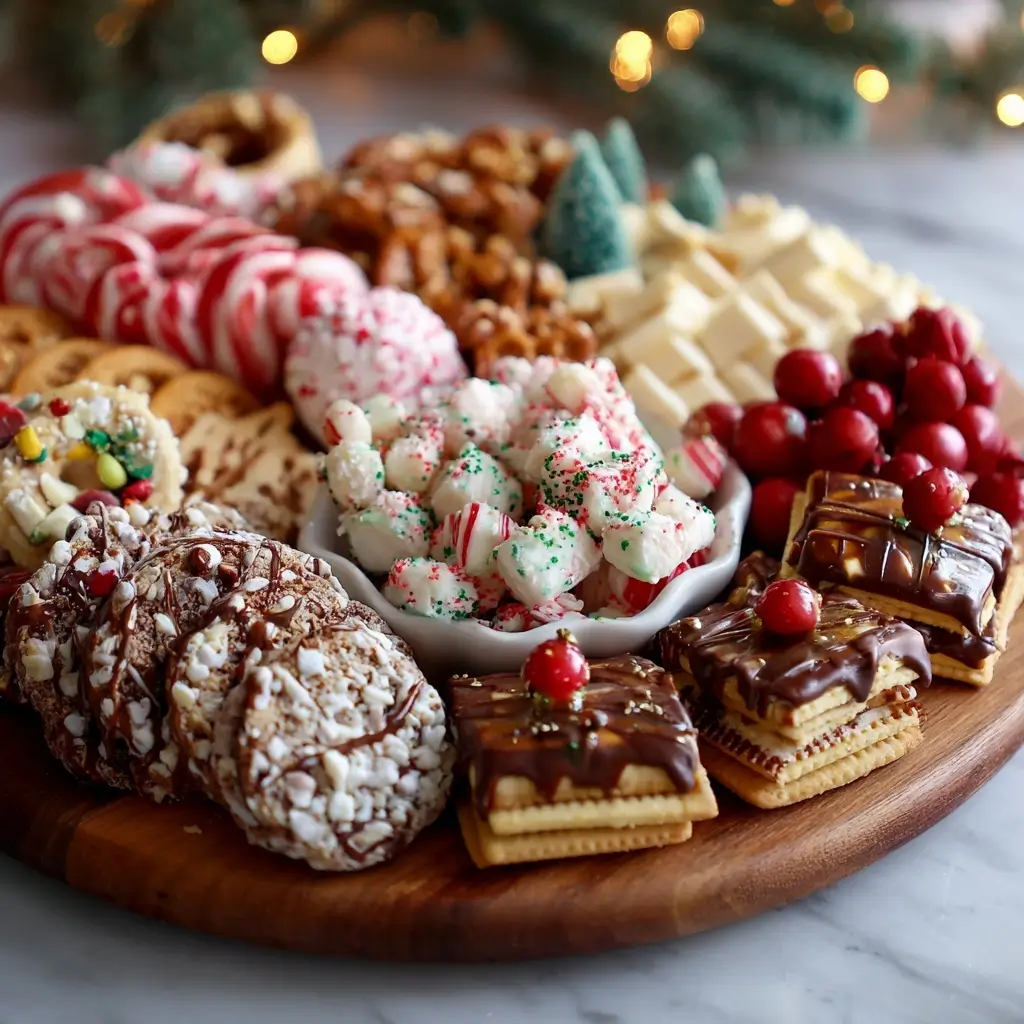
A great Christmas Cookie Board isn’t just a random assortment of sweets—it’s a thoughtfully curated collection that balances colors, textures, sweetness levels, and themes. Here’s how to break it down:
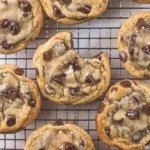
- Cookies (6–8 varieties): Choose a mix of homemade and store-bought for convenience. Think sugar cookies, gingerbread men, chocolate crinkles, snickerdoodles, shortbread, peppermint bark cookies, and biscotti.
- Candies (4–5 types): Include nostalgic holiday favorites like candy canes, peppermint sticks, chocolate-covered pretzels, gummy bears, Swedish fish, gumdrops, or M&Ms in red and green.
- Chocolates (2–3 selections): Offer a range from milk to dark chocolate. Consider truffles, chocolate bars broken into pieces, or mini chocolate Santas.
- Fresh and Dried Fruits: Add natural sweetness and color with cranberries, pomegranate arils, orange slices, apple wedges, banana coins (lightly brushed with lemon juice), dried apricots, or figs.
- Cheese Pairings (optional but recommended): Yes, cheese! Soft brie, creamy goat cheese, or mild cheddar can balance the sweetness and add sophistication. Mini cheese balls rolled in crushed pecans are festive too.
- Dips and Spreads: Include small bowls of Nutella, peanut butter, marshmallow fluff, white chocolate ganache, or eggnog dip for dunking.
- Nuts and Crunch Elements: Roasted almonds, candied pecans, pistachios, or caramel corn add texture contrast.
- Decorative Garnishes: Fresh rosemary sprigs (edible and pine-scented), cinnamon sticks, edible gold dust, or holly-shaped cookie cutters placed around the board enhance the holiday vibe.
- Serve Ware: Use wooden boards, marble slabs, ceramic platters, or even vintage trays. Tiered stands add dimension.
Step-by-Step Recipe: How to Assemble Your Christmas Cookie Board
Creating a show-stopping dessert board is easier than you think. Follow these steps for a picture-perfect presentation:
- Choose Your Base: Select a large board or platter (at least 18–24 inches) that fits your space and guest count. Wipe it clean and dry thoroughly.
- Prepare All Components Ahead of Time: Bake cookies 1–2 days in advance and store in airtight containers. Chop fruits, portion dips, and unwrap candies. Everything should be ready before assembly.
- Place Dips First: Position small ramekins or jars with spreads evenly across the board. This anchors the layout and prevents overcrowding later.
- Arrange Larger Items Next: Place cheeses, fruit clusters, or decorative elements like cinnamon bundles or rosemary sprigs. These act as visual “pillars” on the board.
- Add Cookies in Groups: Cluster similar cookies together in sections. For example, place all gingerbread men in one corner, sugar cookies in another. Alternate colors and shapes for visual rhythm.
- Fill Gaps with Candies and Chocolates: Use colorful candies to fill empty spaces. Scatter them in small piles or lines between cookie sections.
- Incorporate Height and Texture: Stack some cookies, prop biscotti against a jar, or use mini cupcake liners to hold tiny treats. This adds depth.
- Garnish Thoughtfully: Tuck fresh rosemary or holly leaves between items. Sprinkle edible glitter or snow-like powdered sugar over certain areas for magic.
- Label If Needed: Use small chalkboard signs or printed tags to label homemade vs. store-bought, nut-free options, or allergens.
- Serve Immediately or Chill Briefly: If using perishable items like cream cheese or fresh fruit, refrigerate until 30 minutes before serving.
Tips for a Perfect Christmas Cookie Board
- Balance Sweetness: Not everything should be ultra-sweet. Include tart cranberries, bitter dark chocolate, or salty nuts to create contrast.
- Think About Accessibility: Make sure every guest can reach treats. Avoid placing key items only in the center unless you provide serving tongs.
- Use Color Themes: Stick to traditional red, green, white, and gold—or go modern with silver, navy, and rose gold.
- Include Kid-Friendly Zones: Dedicate one section to fun, colorful treats like sprinkled cookies or lollipops to delight younger guests.
- Don’t Overcrowd: Leave breathing room between clusters so the board doesn’t look chaotic.
- Refresh Mid-Event: If serving over several hours, have backup items ready to refill popular spots.
- Photograph It First: Before anyone digs in, take a top-down photo. It’ll be a cherished memory!
- Make It Interactive: Let guests assemble their own mini-desserts by pairing cookies with spreads or fruits.
Variations and Customizations
The beauty of a Christmas Cookie Board lies in its versatility. Here are creative ways to personalize it:
- Themed Boards: Create a “North Pole” board with polar bear cookies, blue-tinted frosting, and cotton candy “snow.” Or a “Winter Wonderland” with white chocolate-dipped treats and shimmering sugar.
- Dietary Accommodations: Offer gluten-free cookies, vegan chocolates, sugar-free candies, or nut-free zones. Label clearly to help guests navigate safely.
- International Touches: Feature global holiday sweets: Italian pizzelle, Mexican polvorones, German springerle, or French marrons glacés.
- Adult-Only Version: Add champagne truffles, wine-infused chocolates, or boozy fruit skewers marinated in brandy. Pair with mulled wine or spiked cocoa.
- Cookie Decorating Station: Set up a DIY area with plain sugar cookies, icing, and sprinkles. Guests can decorate and add their creations to the board.
- Mini Individual Boards: For intimate gatherings, prepare personal-sized boards in mason jar lids or mini cutting boards—perfect for gifting or party favors.
- “Reverse” Board: Focus on savory-sweet balance with more cheese, charcuterie-style meats (like spiced turkey slices), and fewer sugary items.
Health Considerations and Nutritional Value
While a dessert charcuterie board is meant for celebration, there are ways to make it slightly healthier without sacrificing flavor:
- Portion Control: Small bites encourage moderation. The board format naturally limits overeating compared to a cookie tray.
- Add Nutrient-Dense Options: Fresh fruits offer vitamins and fiber. Nuts provide healthy fats and protein to offset sugar spikes.
- Opt for Quality Ingredients: Choose dark chocolate (70%+ cocoa) for antioxidants. Use natural sweeteners like honey or maple syrup in homemade items.
- Limited Processed Sugars: When possible, avoid candies with artificial dyes or high-fructose corn syrup.
- Balanced Pairings: Combining a cookie with cheese or nuts slows sugar absorption and increases satiety.
- Allergen Awareness: Clearly label common allergens: nuts, dairy, eggs, gluten. Offer substitutions where needed.
- Hydration Reminder: Serve sparkling water, herbal tea, or infused water alongside the board to aid digestion and prevent dehydration from sugary foods.
Ingredients for a Classic Christmas Cookie Board (Serves 8–12)
- 1 dozen decorated sugar cookies (assorted shapes)
- 1 dozen gingerbread men
- 1 dozen chocolate crinkle cookies
- 1 dozen snickerdoodles
- ½ cup peppermint bark pieces
- ½ cup chocolate-covered pretzels
- 1 cup assorted holiday M&Ms or Reese’s Pieces
- ½ cup gummy bears or jelly beans (red/green)
- 1 block white chocolate and 1 block dark chocolate (broken into shards)
- 1 cup fresh cranberries
- 1 pomegranate, seeds extracted
- 1 apple, thinly sliced and dipped in lemon water
- ½ cup banana coins (fresh, lightly coated in citrus juice)
- 4 oz brie cheese (round or sliced)
- 4 oz goat cheese (rolled into balls, optional coating of crushed pecans)
- ¼ cup candied pecans
- ¼ cup roasted salted almonds
- 3 small ramekins: Nutella, marshmallow fluff, white chocolate ganache
- 5–6 rosemary sprigs (food-safe, pesticide-free)
- 4–5 cinnamon sticks
- Edible glitter or powdered sugar (for dusting)
Directions
There’s no cooking involved in assembling the board—just creativity and care! Follow the step-by-step assembly guide above under “Step-by-Step Recipe.” Total prep time: 30–45 minutes (plus baking time if making homemade cookies).
FAQ
Q: Can I make the Christmas Cookie Board ahead of time?
A: Yes, but with caveats. Assemble the board up to 4 hours in advance. Store covered in a cool place (not fridge, to avoid condensation on chocolate). Add delicate items like banana or whipped cream-based dips just before serving.
Q: How do I keep cookies from getting soggy?
A: Avoid placing moist fruits directly on cookies. Use small barriers like parchment squares or separate compartments. Serve crisp cookies like biscotti first.
Q: What can I use instead of cheese?
A: If avoiding dairy, try coconut-based “cheeses,” avocado chocolate mousse cups, or simply double up on nut clusters and fruits.
Q: Can I freeze parts of the board?
A: Baked cookies can be frozen up to 3 months. Thaw at room temperature before arranging. Do not freeze assembled boards.
Q: How do I store leftovers?
A: Disassemble the board. Store cookies in airtight containers, fruits in sealed bags in the fridge (use within 1–2 days), and leftover dips per their original instructions.
Q: Is a dessert charcuterie board expensive?
A: It can be, but it doesn’t have to be. Mix affordable store-bought items (like seasonal M&Ms) with a few special homemade touches. Buy in bulk and repurpose leftovers into gift jars.
Summary
The Christmas Cookie Board or Dessert Charcuterie is a joyful, customizable centerpiece that blends tradition with modern flair, offering something sweet for everyone. Elegant yet easy to make, it transforms holiday entertaining into a shared sensory experience full of flavor, color, and festive spirit.