Introduction
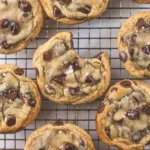
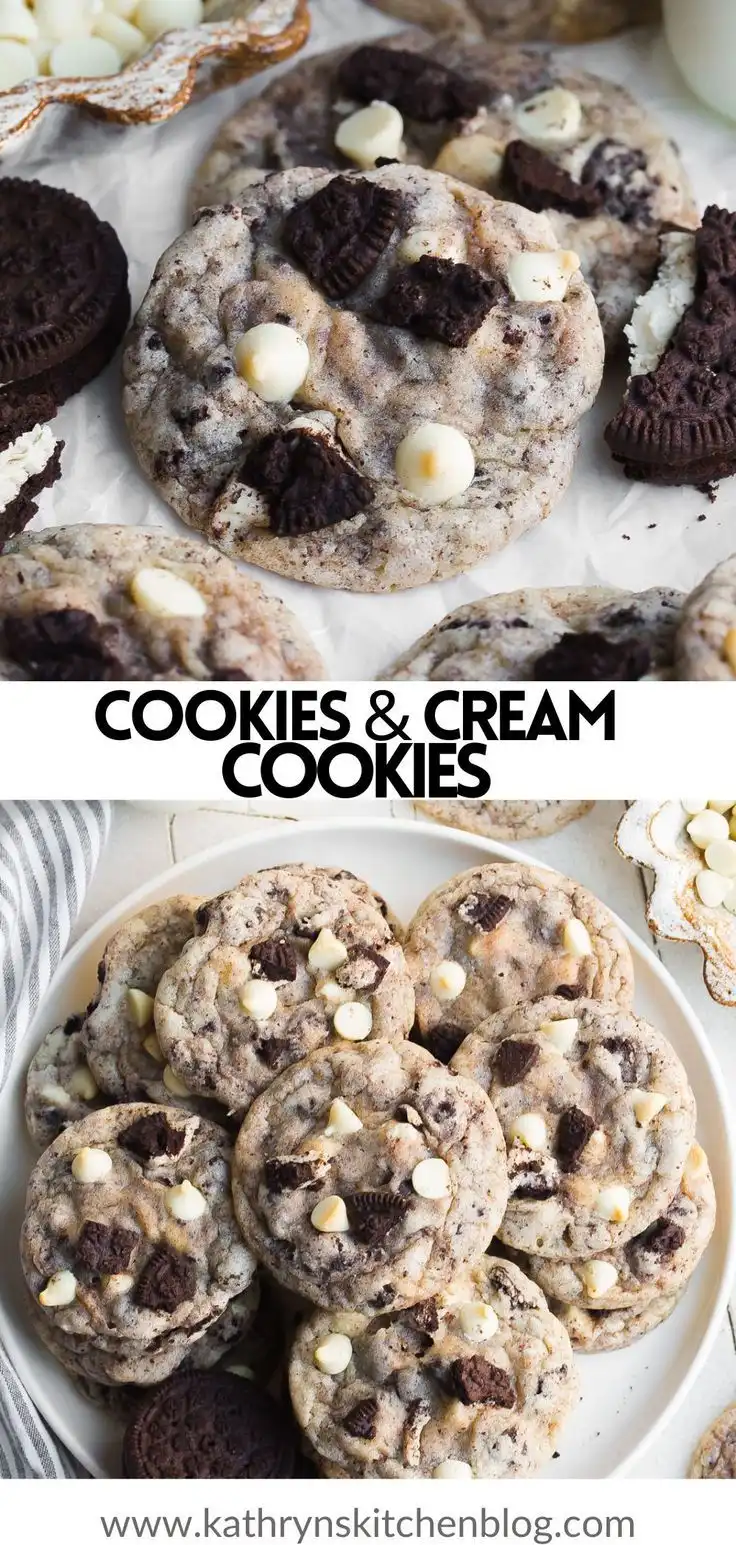
Cookies and Cream Cookies are a beloved American classic—a decadent, nostalgic treat that marries the rich, buttery crumbliness of a soft-baked chocolate chip-style cookie with the unmistakable, creamy sweetness of crushed Oreo® cookies. Unlike traditional chocolate chip cookies, these confections feature generous pockets of real cookie pieces—often including both the dark chocolate wafers and the signature vanilla cream filling—that melt, swirl, and contrast beautifully with the tender, golden-brown cookie base. Whether enjoyed fresh from the oven with a glass of cold milk, packed into lunchboxes, gifted in festive tins, or served at birthday parties and bake sales, Cookies and Cream Cookies deliver instant joy through texture, flavor, and memory. Their simplicity belies their sophistication: few ingredients, minimal technique, yet maximum impact—making them accessible to novice bakers while remaining endlessly customizable for seasoned pastry enthusiasts.
The History
The origins of Cookies and Cream Cookies are deeply intertwined with the cultural rise of the Oreo® cookie itself. Introduced by Nabisco in 1912, Oreos quickly became America’s best-selling cookie—and by the 1970s, home bakers began experimenting with incorporating them into desserts beyond the classic “twist, lick, dunk” ritual. The first documented appearance of a “Cookies and Cream Cookie” recipe appeared in regional community cookbooks and women’s magazines in the early 1980s, often under names like “Oreo Drop Cookies” or “Cream-Filled Chocolate Crumb Cookies.” However, it wasn’t until the late 1990s—fueled by the explosive popularity of Cookies and Cream ice cream (which debuted commercially in 1983 at South Dakota’s Blue Bell Creameries and later skyrocketed after Ben & Jerry’s launched their version in 1991)—that bakers intentionally replicated that iconic flavor profile in cookie form. The trend accelerated in the 2000s with food blogs, YouTube baking channels, and viral social media posts showcasing dramatic cross-sections of cookies studded with speckles of black cookie shards and ivory cream swirls. Today, Cookies and Cream Cookies exist as both a mainstream bakery staple and a canvas for culinary innovation—honoring tradition while inviting reinvention across dietary lifestyles, global flavor palettes, and artisanal techniques.
Ingredients Breakdown
Every exceptional Cookies and Cream Cookie begins with intentionality—not just in measurement, but in ingredient selection and function. Below is a detailed breakdown of each component and why it matters:
- Unsalted Butter (1 cup / 2 sticks, softened): Provides richness, tenderness, and structure. Softened (not melted) butter creams effectively with sugar to trap air—critical for lift and chew. Unsalted allows precise control over sodium levels and avoids flavor interference.
- Granulated Sugar (¾ cup): Adds sweetness, crispness at the edges, and aids in caramelization during baking. Its fine crystals dissolve easily and contribute to spread control.
- Packed Light Brown Sugar (¾ cup): Introduces molasses-derived moisture, acidity, and deep caramel notes. The moisture helps retain chewiness; the acidity activates baking soda for optimal rise. “Packed” ensures consistency and prevents under-measurement.
- Large Eggs (2, room temperature): Act as emulsifiers, binders, and leavening agents. Room-temperature eggs incorporate more evenly into the batter and reduce risk of seizing the butter-sugar mixture. The yolks add fat and richness; whites provide structure.
- Pure Vanilla Extract (2 tsp): Enhances all other flavors without overpowering. Alcohol-based extract carries aromatic compounds further than imitation versions. For depth, many bakers add ½ tsp of vanilla bean paste or seeds.
- All-Purpose Flour (2¼ cups, spooned & leveled): The structural backbone. Spooning and leveling (rather than scooping) prevents overpacking and excess gluten development—ensuring softness, not toughness. A small amount of cornstarch (1–2 tbsp, optional) can be added to mimic cake flour for extra tenderness.
- Baking Soda (1 tsp): Reacts with the acidic molasses in brown sugar to produce carbon dioxide—creating lift and spread. It also promotes browning via the Maillard reaction.
- Finely Ground Sea Salt (1 tsp): Not just for seasoning—salt amplifies sweetness, balances bitterness, and tightens gluten networks for improved texture. Flaky sea salt sprinkled on top pre-bake adds a luxurious finishing contrast.
- Crushed Oreos® (2 cups / ~24 full cookies, finely chopped with cream filling intact): The star ingredient. Crushing *with* the cream filling preserves the authentic Cookies and Cream experience—no separating required. Use a food processor for uniform, confetti-like pieces (¼” or smaller); avoid pulverizing into dust. For best results, chill crushed Oreos for 10 minutes before folding in to prevent melting into the batter.
- Optional Additions: ½ cup white chocolate chips (for extra creaminess), ¼ tsp espresso powder (to deepen chocolate notes), or 1 tbsp sour cream (for enhanced moisture and tang).
Step-by-Step Recipe
- Prep Work (15 minutes): Position oven racks in upper and lower thirds. Preheat oven to 375°F (190°C). Line two large baking sheets with parchment paper or silicone baking mats—do not grease, as excess fat causes overspreading. Measure and prep all ingredients. Crush Oreos in a food processor until uniformly pebbled (15–20 pulses), then transfer to a small bowl and refrigerate.
- Cream Butter & Sugars (3–4 minutes): In a large stand mixer fitted with paddle attachment, beat softened butter, granulated sugar, and brown sugar on medium-high speed until pale, fluffy, and noticeably increased in volume—about 3–4 minutes. Scrape down bowl and paddle halfway. The mixture should hold soft peaks when paddle is lifted.
- Incorporate Wet Ingredients (2 minutes): Add eggs one at a time, beating on medium speed for 60 seconds after each addition until fully incorporated and glossy. Add vanilla and mix 30 seconds more. Batter will appear thick and slightly curdled—this is normal and will resolve upon flour addition.
- Combine Dry Ingredients (1 minute): In a separate medium bowl, whisk together flour, baking soda, and salt until fully homogenized. Sift once for guaranteed lump-free blending.
- Gradual Dry-Wet Integration (2 minutes): Reduce mixer speed to low. Add dry ingredients in three equal portions, mixing only until just combined after each addition—about 15–20 seconds per portion. Overmixing develops gluten and yields tough cookies. Stop as soon as no dry streaks remain.
- Fold in Oreos (1 minute): Using a flexible spatula, gently fold in chilled crushed Oreos just until evenly distributed—no more than 15–20 folds. Avoid overworking; some small clusters are desirable for visual appeal and textural contrast.
- Chill Dough (Minimum 60 minutes, ideally 2–3 hours or overnight): Portion dough into 2-tbsp balls (a #40 scoop works perfectly), place 2″ apart on prepared sheets, then flatten slightly to ¾” thickness. Cover sheets tightly with plastic wrap and refrigerate. Chilling solidifies butter, slows spread, enhances flavor melding, and improves browning. For deeper flavor and caramel complexity, chill overnight (up to 72 hours).
- Bake Strategically (10–12 minutes per batch): Bake one sheet at a time in center rack. Rotate sheet front-to-back halfway through. Cookies are done when edges are deeply golden and set, centers appear puffed and slightly soft (they’ll firm as they cool), and surface cracks begin to glisten. Do not overbake—residual heat continues cooking. Typical bake time: 10.5 minutes at 375°F.
- Cool & Set (15–20 minutes): Let cookies rest on baking sheet for 5 minutes—this allows structure to set. Then carefully transfer to wire racks using a thin spatula. Cool completely (10–15 minutes) before storing or serving. Warm cookies are fragile; fully cooled ones reveal ideal chew-and-crisp balance.
Tips
- Butter Temperature is Non-Negotiable: Butter should be cool to the touch (~65°F), leaving a slight indentation when pressed—but not oily or shiny. Too warm = flat, greasy cookies. Too cold = dense, crumbly texture. If in doubt, cut into cubes and let sit at room temp 20–30 minutes.
- Measure Flour Correctly: Use the “spoon-and-level” method: fluff flour in bag, spoon into measuring cup, then level with straight edge. Scooping compacts flour and adds up to 25% excess—guaranteeing dry, tough cookies.
- Chill Crushed Oreos Separately: Warm cookie pieces soften butter in dough, causing premature melting and uneven distribution. Refrigerating them for 10+ minutes keeps them intact and cool.
- Underbake Slightly: Remove cookies when centers still look soft and glossy—they’ll continue setting on the hot sheet. Overbaked Cookies and Cream Cookies lose their signature creaminess and become brittle.
- Rotate & Swap Racks: Home ovens have hot spots. Rotating sheets halfway and alternating upper/lower rack positions between batches ensures even browning and consistent texture.
- Use Parchment, Not Wax Paper: Wax paper melts and smokes at baking temperatures. Parchment is heat-safe up to 425°F and prevents sticking without added oil.
- Invest in an Oven Thermometer: Built-in oven dials are notoriously inaccurate—sometimes off by ±25°F. An inexpensive oven thermometer ensures precise temperature control for reliable results.
- Freeze Dough Balls for Future Baking: Portion chilled dough into balls, freeze on tray until solid (1 hr), then transfer to airtight freezer bag. Bake straight from frozen—add 1–2 minutes to bake time. Fresh-baked cookies anytime!
- Revive Stale Cookies: Place hardened cookies on a parchment-lined sheet and bake at 300°F for 3–4 minutes. The gentle heat re-melts fats and restores crisp edges with chewy centers.
- Store Thoughtfully: Keep cooled cookies in an airtight container at room temperature for up to 5 days. Add a slice of plain white bread—it releases moisture slowly and keeps cookies soft. For longer storage, freeze baked cookies for up to 3 months.
Variations and Customizations
The Cookies and Cream Cookie is gloriously adaptable—serving as a foundation for creativity across dietary needs, global inspirations, and seasonal flair. Explore these popular and innovative twists:
- Gluten-Free Version: Substitute 1:1 gluten-free all-purpose flour blend (like King Arthur or Bob’s Red Mill) + ½ tsp xanthan gum (if not included in blend). Use certified GF Oreos (e.g., Kinnikinnick or Glutino brands) or make your own GF chocolate sandwich cookies.
- Vegan Adaptation: Replace butter with vegan butter (Miyoko’s or Earth Balance), eggs with flax eggs (2 tbsp ground flax + 6 tbsp water, rested 10 mins), and use dairy-free chocolate sandwich cookies (e.g., Newman-O’s or homemade versions). Add 1 tbsp almond milk if batter seems too stiff.
- Protein-Powered Cookies: Add ¼ cup unflavored or vanilla whey or plant-based protein powder. Reduce flour by 2 tbsp to compensate. Increase egg to 3 (or add 1 flax egg) for binding. Chill dough extra-long (3+ hours) to hydrate protein.
- Double-Chocolate Cookies and Cream: Fold in ½ cup mini semi-sweet chocolate chips along with Oreos. Or replace ¼ cup flour with unsweetened cocoa powder for subtle chocolate depth.
- Espresso-Infused: Stir in 1 tsp instant espresso powder with dry ingredients. Complements the chocolate and enhances creaminess without tasting “coffee-forward.”
- Salted Caramel Swirl: After portioning dough balls, press a ½ tsp dollop of thick salted caramel sauce into center of each, then pinch closed and reshape. Creates gooey, salty-sweet pockets.
- Peppermint Crunch: Add ½ tsp peppermint extract with vanilla and fold in ⅓ cup crushed candy canes or peppermint bark with Oreos—perfect for winter holidays.
- Matcha White Chocolate: Whisk 1 tbsp ceremonial-grade matcha into dry ingredients. Fold in ½ cup white chocolate chips and 1 cup finely crushed Matcha Oreos (or green tea sandwich cookies).
- Spiced Chai Variation: Add 1 tsp ground cinnamon, ¼ tsp cardamom, ⅛ tsp cloves, and ⅛ tsp black pepper to dry ingredients. Pair with vanilla bean-speckled Oreos or homemade chai-spiced cream-filled cookies.
- Mini Bite-Sized Cookies: Use a #60 scoop for delicate 1-inch cookies—ideal for parties, cookie platters, or portion control. Bake 7–8 minutes at same temperature.
- Stuffed “Cookie Bomb” Style: Flatten dough into discs, place 1 whole mini Oreo in center, fold edges over, and roll into ball. Creates a molten cream core when baked.
- Decorative Finishing Touches: Press extra crushed Oreos onto tops before baking. Drizzle with melted white chocolate and sprinkle with edible gold dust or rainbow sprinkles post-cooling.
Health Considerations and Nutritional Value
While Cookies and Cream Cookies are undeniably indulgent, understanding their nutritional composition supports mindful enjoyment and informed customization. A standard 3-inch cookie (made with the base recipe, yielding ~24 cookies) contains approximately:
- Calories: 220–240 kcal
- Total Fat: 12–14g (including 7–8g saturated fat)
- Carbohydrates: 28–30g (including 19–21g sugars, of which ~12g are added)
- Protein: 2–3g
- Fiber: <1g (naturally low—enhance with oat flour or added psyllium)
- Sodium: 140–160mg
Key Health Notes:
- Sugar Awareness: Traditional recipes rely heavily on refined sugars. To reduce glycemic impact, substitute up to ¼ cup brown sugar with coconut sugar (lower GI, mineral-rich) or monk fruit blend (zero-calorie, non-glycemic). Note: sugar plays a functional role in texture—full replacement may affect spread and chew.
- Butter vs. Alternatives: While butter contributes saturated fat, it also provides fat-soluble vitamins (A, D, E, K2) and butyrate—an anti-inflammatory short-chain fatty acid. For heart-health focus, consider replacing half the butter with avocado oil or high-oleic sunflower oil—but expect softer, less structured cookies.
- Oreo Considerations: Standard Oreos contain palm oil, high-fructose corn syrup, and artificial flavors. Opt for “Less Sugar” or “Whole Grain” Oreos—or better yet, bake your own clean-label chocolate sandwich cookies using almond flour, dates, and coconut oil.
- Dietary Modifications: Gluten-free, vegan, or low-sugar versions require careful balancing of structure, moisture, and flavor. Always test small batches first. Nutrition labels vary widely across substitutions—use apps like Cronometer or MyFitnessPal for precise tracking.
- Portion Mindfulness: Because of their rich density and high palatability, Cookies and Cream Cookies trigger strong hedonic responses. Serving size awareness (e.g., one cookie with tea vs. three with ice cream) supports sustainable enjoyment without guilt.
- Functional Additions: Boost nutrition subtly by stirring in 2 tbsp ground flaxseed (omega-3s, fiber), 1 tbsp chia seeds (hydration, protein), or ¼ cup finely ground walnuts (antioxidants, crunch). These additions increase satiety and nutrient density without compromising authenticity.
Ultimately, Cookies and Cream Cookies belong in a balanced diet—not as daily staples, but as joyful, intentional treats rooted in craftsmanship, nostalgia, and shared pleasure. Prioritizing whole-food ingredients, thoughtful portioning, and occasional homemade alternatives transforms them from empty calories into meaningful moments of comfort and connection.
Ingredients
- 1 cup (2 sticks / 227g) unsalted butter, softened to 65°F
- ¾ cup (150g) granulated sugar
- ¾ cup (165g) packed light brown sugar
- 2 large eggs, room temperature
- 2 teaspoons pure vanilla extract
- 2¼ cups (285g) all-purpose flour, spooned & leveled
- 1 teaspoon baking soda
- 1 teaspoon fine sea salt
- 2 cups (about 24 cookies / 200g) Oreos®, finely crushed with cream filling intact (see Tips for best method)
Directions
- Preheat oven to 375°F (190°C). Line two large baking sheets with parchment paper or silicone baking mats.
- In a food processor, pulse Oreos until broken into fine, confetti-like pieces (~¼ inch), about 15–20 pulses. Transfer to a small bowl and refrigerate for at least 10 minutes.
- In the bowl of a stand mixer fitted with paddle attachment, combine softened butter, granulated sugar, and brown sugar. Beat on medium-high speed for 3–4 minutes, scraping down sides halfway, until light, fluffy, and pale in color.
- Add eggs one at a time, beating on medium speed for 60 seconds after each addition until fully incorporated and glossy. Add vanilla and mix for 30 seconds more.
- In a separate medium bowl, whisk together flour, baking soda, and salt until thoroughly combined. Sift once for uniformity.
- Reduce mixer speed to low. Add dry ingredients in three equal portions, mixing only until just incorporated after each addition—about 15–20 seconds per portion. Do not overmix.
- Using a flexible spatula, gently fold in chilled crushed Oreos until evenly distributed—15–20 folds max. Some small clusters are ideal.
- Portion dough into 2-tablespoon balls (a #40 scoop is perfect), place 2 inches apart on prepared sheets, and gently flatten each to ¾-inch thickness. Cover sheets tightly with plastic wrap and refrigerate for at least 60 minutes—or up to 72 hours for enhanced flavor.
- Bake one sheet at a time on center rack for 10–12 minutes, rotating sheet halfway through, until edges are deeply golden and set, centers are puffed and soft to the touch, and surface shows delicate cracking. Do not overbake.
- Let cookies cool on baking sheet for exactly 5 minutes to set structure, then carefully transfer to wire racks to cool completely (10–15 minutes).
- Store cooled cookies in an airtight container at room temperature for up to 5 days—or freeze baked cookies for up to 3 months.
FAQ
- Can I use store-bought Oreo crumbs instead of crushing my own?
- Yes—but with caveats. Most commercial Oreo crumbs are dehydrated and lack the creamy, moist texture critical to authentic Cookies and Cream Cookies. They often contain anti-caking agents and preservatives that alter spread and mouthfeel. For best results, crush fresh Oreos yourself. If using store-bought, add 1 tsp of heavy cream or sour cream to the batter to restore moisture.
- Why did my cookies spread too much and turn greasy?
- Over-softened or melted butter is the most common culprit. Also check: (1) Did you measure flour correctly? Too little flour = excess spread. (2) Was dough sufficiently chilled? Skipping or shortening chill time dramatically increases spread. (3) Was baking soda expired? Inactive leavener fails to support structure. Test soda by adding ¼ tsp to 3 tbsp vinegar—if it doesn’t bubble vigorously, replace it.
- Can I make these ahead and freeze the dough?
- Absolutely—and highly recommended! Portion chilled dough into balls, freeze uncovered on a tray for 1 hour, then transfer to freezer-safe bags. Bake directly from frozen: add 1–2 minutes to bake time and expect slightly thicker, chewier cookies. Dough freezes well up to 3 months.
- My cookies turned out cakey instead of chewy. What went wrong?
- Cakey texture usually stems from too much leavening (extra baking soda), overmixing after adding flour (developing gluten), or using cake flour instead of all-purpose. Also, excessive egg or liquid (e.g., adding milk) increases rise and airiness. Stick to the recipe’s precise ratios and mixing times.
- Are there allergy-friendly Oreo alternatives I can use?
- Yes! For nut-free: Kinnikinnick’s Gluten-Free Chocolate Sandwich Cookies. For dairy-free: Newman’s Own Organic Newman-O’s or Voortman Dairy-Free Chocolate Sandwich Cookies. Always verify labeling, as formulations change. You can also make your own allergen-free version using oat flour, cocoa, maple syrup, and coconut oil-based “cream” filling.
- Can I add chocolate chips to this recipe?
- You can—but do so thoughtfully. Adding ½ cup mini semi-sweet or white chocolate chips complements the Oreo flavor beautifully. To maintain balance, reduce crushed Oreos by ¼ cup so total add-ins remain ~2 cups. Avoid large chips—they compete with Oreo texture and may cause uneven baking.
- Why do some recipes include cornstarch? Is it necessary?
- Cornstarch (1–2 tbsp) replaces part of the flour to inhibit gluten formation, yielding ultra-tender, melt-in-your-mouth cookies. It’s optional but recommended for premium bakery-style softness. If using, reduce flour by the same amount and whisk cornstarch into dry ingredients.
- How do I get those beautiful crackled tops?
- Cracking occurs when the surface dries and sets faster than the interior expands. Ensure your oven is fully preheated, avoid opening the door early, and use room-temperature eggs (cold eggs lower batter temp, delaying surface set). Also, slightly underbaking—removing when centers are still soft—preserves that signature crinkled crown.
- Can I make these with other sandwich cookies?
- Absolutely! Hydrox (original chocolate sandwich cookie), Famous Amos, or even homemade chocolate graham crackers with vanilla frosting yield delicious riffs. Adjust crush size and chilling time based on cream consistency—softer fillings need colder handling.
- What’s the best way to store Cookies and Cream Cookies long-term?
- For freshness up to 5 days: airtight container + slice of white bread. For longer storage: freeze baked cookies in single layers separated by parchment, then sealed in freezer bags. Thaw at room temperature for 15 minutes or reheat in 300°F oven for 3 minutes. Never refrigerate—condensation makes them soggy.
Summary
Cookies and Cream Cookies are a masterclass in joyful simplicity—where high-quality ingredients, precise technique, and mindful chilling converge to create irresistibly soft, chewy, and nostalgically rich treats studded with real Oreo magic. From their mid-century snack-culture roots to today’s vibrant landscape of dietary adaptations and global flavor fusions, they remain a timeless canvas for both comfort and creativity.
Whether you’re baking your first batch or your thousandth, success lies in honoring fundamentals—properly softened butter, accurate flour measurement, adequately chilled dough, and respect for the humble, creamy-crunchy alchemy that defines the Cookies and Cream experience.