Introduction
Oreo Icebox Cake is a no-bake dessert that’s as simple as it is delicious. Combining the creamy texture of whipped topping and the rich, chocolatey crunch of Oreo cookies, this cake is a crowd-pleaser perfect for any occasion. Whether you’re hosting a summer BBQ, a holiday gathering, or just craving a sweet treat, this Oreo Icebox Cake will satisfy your dessert cravings without requiring you to turn on the oven.
The History
The icebox cake has roots that go back to the early 20th century, when families stored their food in iceboxes instead of electric refrigerators. The concept was simple: layer cookies and cream or custard, then chill until set. Over time, the recipe evolved, and with the invention of pre-made whipped toppings and cream cheese frostings, the modern version of the Oreo Icebox Cake was born. Today, it remains a nostalgic favorite and a go-to dessert for busy home bakers.
Ingredients Breakdown
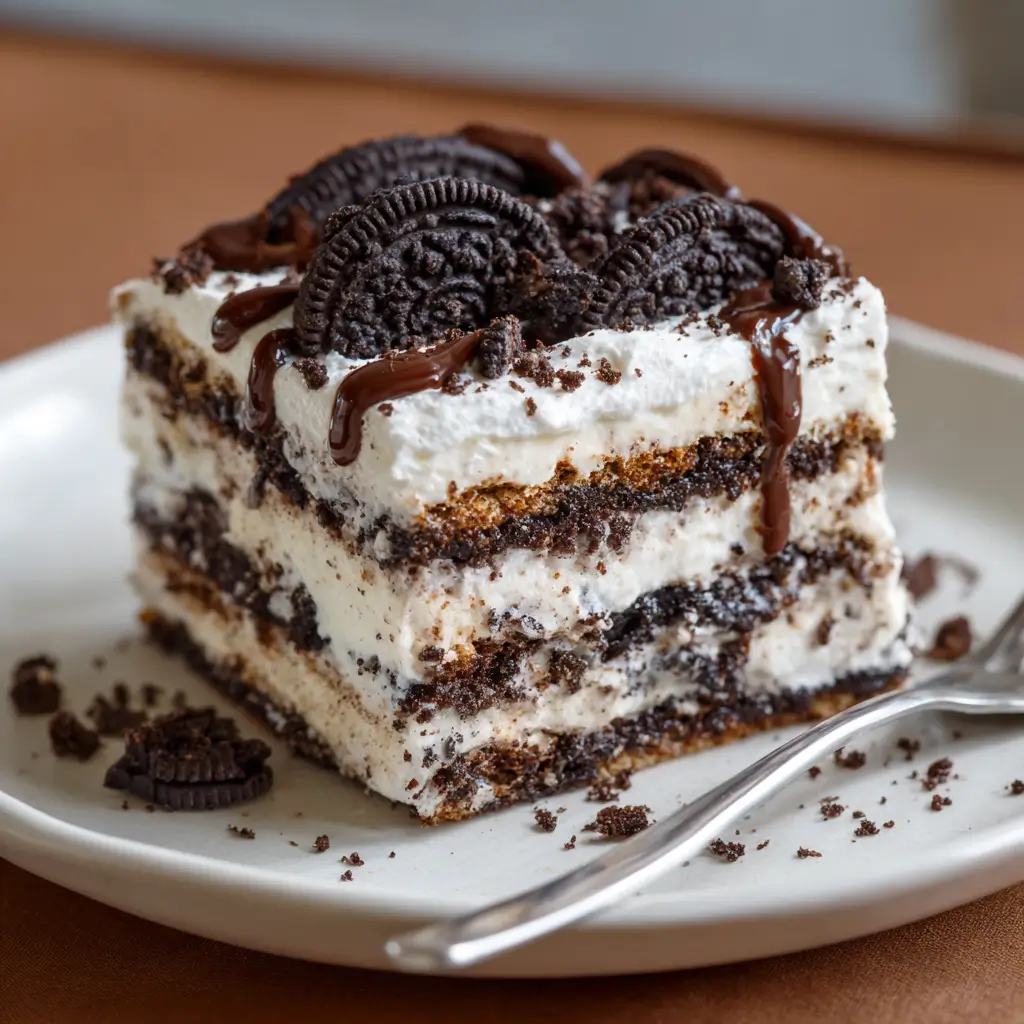
Each ingredient in this Oreo Icebox Cake plays a crucial role in creating its signature texture and flavor:
- Oreo Cookies: Provide a rich, chocolatey base and add crunch to every bite.
- Cool Whip: Adds a light, airy texture and binds the layers together.
- Cream Cheese: Offers a tangy contrast that balances the sweetness.
- Milk: Helps soften the Oreos slightly, making the layers more cohesive.
- Vanilla Extract: Enhances the overall flavor profile with a warm, aromatic note.
Step-by-Step Recipe
- In a large bowl, combine 8 oz of softened cream cheese, 1 teaspoon of vanilla extract, and 3 ½ cups of thawed Cool Whip. Mix until smooth and well combined.
- Crush 36 Oreo cookies (reserving a few for topping) in a food processor or by hand until they resemble coarse crumbs.
- In a 9×13-inch dish, begin layering: spread a thin layer of the cream mixture, followed by a layer of crushed Oreos, then drizzle with a little milk to slightly soften the crust. Repeat layers, finishing with a top layer of cream mixture.
- Crush the reserved Oreos and sprinkle them on top as a garnish.
- Cover with plastic wrap and refrigerate for at least 6 hours or overnight.
Tips
- To ensure the best texture, use full-fat Cool Whip and cream cheese at room temperature.
- If you’re short on time, you can use store-bought whipped topping instead of making your own mixture.
- For a smoother layering process, crush the Oreos in batches to avoid over-processing.
- Cover the cake well with plastic wrap or foil to prevent any fridge odors from affecting the taste.
Variations and Customizations
- Chocolate Lover’s Version: Add a layer of melted chocolate or chocolate ganache between the layers.
- Strawberry Oreo Twist: Swirl in some strawberry puree or jam into the cream mixture.
- Peppermint Oreo Cake: Add a few drops of peppermint extract to the cream mixture for a festive twist.
- Mini Icebox Cups: Layer the ingredients in individual serving cups or mason jars for a portable version.
Health Considerations and Nutritional Value
While Oreo Icebox Cake is a rich dessert, you can make modifications to suit different dietary needs:
- Low-Fat Version: Substitute regular Cool Whip with a light version and use reduced-fat cream cheese.
- Sugar-Free Option: Use sugar-free Oreos and a sugar-free whipped topping.
- Portion Control: Serve in small portions to enjoy the indulgence without overindulging.
On average, one serving contains approximately 300–400 calories, depending on the portion size and substitutions made.
Ingredients
- 36 Oreo cookies (plus extra for topping)
- 8 oz cream cheese, softened
- 3 ½ cups thawed Cool Whip
- 1 tsp vanilla extract
- 2–3 tbsp milk (for softening layers)
Directions
- In a large bowl, beat the cream cheese, vanilla extract, and Cool Whip together until smooth and fully combined.
- Crush the Oreos into crumbs, reserving a small amount for garnish.
- Layer the mixture in a 9×13-inch pan: start with a thin layer of the cream mixture, followed by a layer of crushed Oreos, and a light drizzle of milk.
- Repeat the layers, finishing with a top layer of the cream mixture.
- Sprinkle the reserved Oreos on top.
- Cover and refrigerate for at least 6 hours or overnight before serving.
FAQ
Can I make this cake ahead of time?
Yes! This cake actually improves in texture when chilled overnight. You can make it up to 2 days in advance and store it covered in the refrigerator.
How long does Oreo Icebox Cake last in the fridge?
Properly stored, the cake will keep for up to 4 days in the refrigerator.
Can I freeze Oreo Icebox Cake?
Yes, but the texture may change slightly. Wrap it tightly in plastic wrap and foil before freezing. Thaw in the refrigerator overnight before serving.
Is there a substitute for Cool Whip?
You can use homemade whipped cream or a store-bought alternative. For a stiffer texture, mix in a bit of cream cheese or mascarpone.
What if I don’t have an 9×13-inch pan?
You can use any deep rectangular or square dish. Adjust layering accordingly, and ensure there’s enough height to accommodate all the layers.
Summary
Oreo Icebox Cake is a creamy, no-bake dessert made with layers of whipped topping, cream cheese, and crushed Oreos, chilled to perfection. Easy to make, endlessly customizable, and always a crowd-pleaser!