Introduction
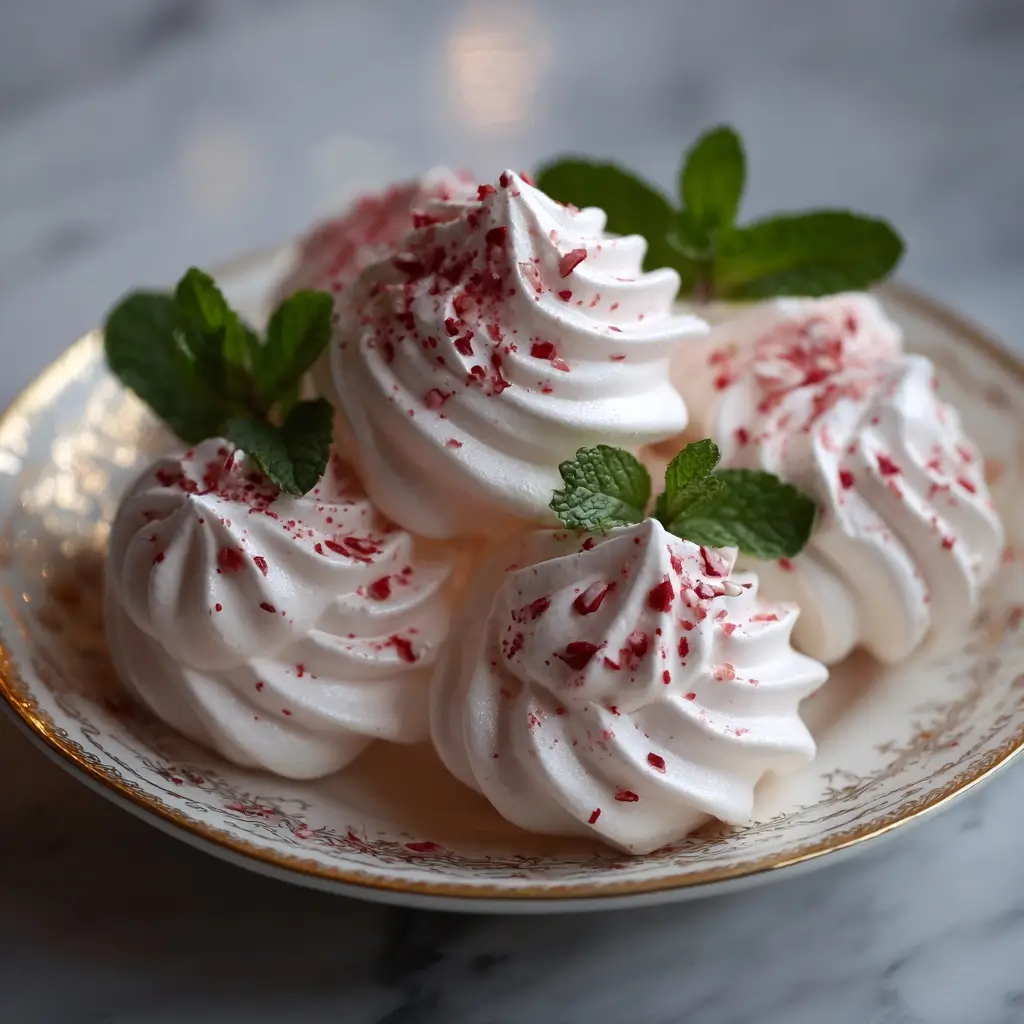
Peppermint Meringues are a delightful confection that combines the airy lightness of meringue with the refreshing coolness of peppermint. These crisp, melt-in-your-mouth cookies are perfect for holiday gatherings, winter celebrations, or anytime you’re craving something sweet and festive. With their snowy white appearance and vibrant red or pink swirls, they not only taste incredible but also serve as an eye-catching treat on dessert platters. Whether you’re an experienced baker or trying your hand at meringues for the first time, this recipe is designed to guide you through every step to create flawless, professional-quality results.
The History
Meringues trace their origins back to the 17th century, with early references appearing in Swiss, French, and Italian cookbooks. The name “meringue” is believed to have been coined by Swiss chef Gasparini in the town of Meiringen, though its exact etymology remains debated. Traditionally made from whipped egg whites and sugar, meringues were prized for their delicate texture and ability to hold shape when baked slowly at low temperatures. Over time, bakers began experimenting with flavors and colors, leading to variations like lemon, chocolate, and eventually peppermint. Peppermint meringues gained popularity in the 20th century, particularly during the holiday season, thanks to their association with candy canes and winter festivities. Today, they remain a beloved seasonal favorite, symbolizing joy, celebration, and the magic of homemade baking.
Ingredients Breakdown
The beauty of peppermint meringues lies in their simplicity—just a few high-quality ingredients come together to create a spectacular result. Let’s examine each one:
- Egg Whites: The foundation of any meringue. They must be fresh, room temperature, and completely free of yolk or fat, which can prevent proper whipping.
- Cream of Tartar: This acidic powder stabilizes the egg whites, helping them achieve stiff peaks and maintain structure during baking.
- Granulated Sugar: Added gradually, it gives meringues their signature sweetness and glossy sheen. It also helps create a crisp exterior while maintaining a soft interior.
- Pure Peppermint Extract: Provides a clean, refreshing mint flavor without the harshness of artificial oils. Be cautious with dosage—too much can overpower.
- Food Coloring (Red or Pink Gel): Gel-based food coloring is preferred over liquid because it doesn’t alter the consistency of the meringue. A little goes a long way for vibrant swirls.
- Crushed Candy Canes (Optional): For added crunch and visual appeal, crushed candy canes can be folded in or sprinkled on top before baking.
Each ingredient plays a crucial role in both texture and flavor, making precision key to success.
Step-by-Step Recipe
- Preheat Oven & Prepare Baking Sheets: Preheat your oven to 225°F (107°C). Line two large baking sheets with parchment paper or silicone baking mats. Trace small circles (about 1.5 inches in diameter) on the parchment using a pencil if you want uniform shapes—these will be your guides for piping.
- Whip Egg Whites: In a perfectly clean, grease-free bowl, add 4 large egg whites. Using a stand mixer or hand mixer, beat on medium speed until frothy (about 1 minute).
- Add Cream of Tartar: Sprinkle in 1/2 teaspoon cream of tartar and continue beating on medium-high speed until soft peaks form—when the whisk is lifted, the peak should curl over slightly.
- Incorporate Sugar Gradually: Slowly add 1 cup (200g) granulated sugar, one tablespoon at a time, ensuring each addition dissolves fully before adding more. Increase speed to high and beat until the mixture is glossy and forms stiff, shiny peaks that hold their shape firmly.
- Flavor and Color: Reduce mixer speed to low. Add 1/2 to 1 teaspoon pure peppermint extract (depending on desired strength). Mix briefly to combine. Remove about 1/3 of the meringue to a separate bowl. Tint this portion with red gel food coloring until you achieve a vibrant hue.
- Swirl Colors Together: Spoon the colored meringue back into the main bowl in dollops. Gently fold 2–3 times with a spatula to create marbled swirls—do not overmix, or the color will blend entirely.
- Optional Add-In: If using crushed candy canes, gently fold in 2–3 tablespoons now.
- Pipe Meringues: Transfer the meringue to a piping bag fitted with a round or star tip. Pipe small rounds onto prepared sheets following the traced circles. Alternatively, use a spoon to drop small mounds evenly spaced apart.
- Bake Slowly: Place one sheet at a time in the center of the oven. Bake for 1 hour and 15 minutes. Rotate the pan halfway through for even drying. The meringues are done when they lift easily from the parchment and feel dry and crisp throughout.
- Cool Completely: Turn off the oven and crack the door open slightly. Let the meringues cool inside for another 30–60 minutes to prevent cracking. Remove and allow to reach room temperature before storing.
Tips
- Avoid Humidity: Make peppermint meringues on a dry day. High humidity can cause meringues to become sticky or fail to crisp properly.
- Use Clean Equipment: Even a trace of oil or yolk can inhibit whipping. Wipe bowls and beaters with lemon juice or vinegar before starting.
- Room Temperature Eggs: Cold egg whites take longer to whip and may not reach full volume.
- Sift the Sugar: Sifting ensures no lumps and promotes even dissolution into the egg whites.
- Don’t Open the Oven Early: Avoid opening the oven door during baking—temperature fluctuations can cause collapse.
- Test for Doneness: One meringue should snap cleanly in half when broken; if it bends, bake longer.
- Store Properly: Keep in an airtight container at room temperature away from moisture. Add a silica gel packet to absorb ambient humidity if needed.
Variations and Customizations
While classic peppermint meringues are stunning on their own, there are countless ways to personalize them:
- Chocolate-Dipped Peppermint Meringues: Melt dark, milk, or white chocolate and dip the cooled meringues halfway. Sprinkle with crushed candy canes before the chocolate sets.
- Double Mint Flavor: Add a few drops of natural green food coloring along with the red for a festive green-and-white version, ideal for St. Patrick’s Day.
- Gluten-Free & Vegan Options: While traditional meringues are naturally gluten-free, vegan versions can be made using aquafaba (the liquid from canned chickpeas) instead of egg whites. Whip 3/4 cup aquafaba with cream of tartar until foamy, then proceed with sugar and flavorings.
- Mini vs. Large Meringues: Adjust size for different uses—mini meringues work well as cake toppers or hot cocoa stirrers, while larger ones can be sandwiched with whipped cream for meringue nests.
- Infused Extracts: Experiment with different mint varieties such as spearmint or wintergreen for a unique twist.
- Edible Glitter or Luster Dust: For extra sparkle, lightly brush finished meringues with edible glitter spray or dust with luster powder.
- Layered Flavors: Create a ripple effect by layering vanilla, chocolate, and peppermint meringues in a single batch for a rainbow-inspired look.
Health Considerations and Nutritional Value
Peppermint meringues are a relatively low-fat treat, primarily composed of protein (from egg whites) and carbohydrates (from sugar). However, they are high in refined sugar, so moderation is advised, especially for individuals managing diabetes or watching their sugar intake. Each standard-sized meringue (about 15g) contains approximately:
- Calories: 45–50
- Total Carbohydrates: 12g (mostly sugars)
- Protein: 1g
- Fat: 0g
- Sodium: 5–10mg
They are naturally gluten-free and dairy-free (unless candy canes or chocolate contain allergens), making them suitable for many dietary restrictions. However, always check labels on extracts and candy canes for hidden additives. Due to the use of raw egg whites that are baked, these meringues are generally safe for consumption, but immunocompromised individuals or pregnant women may prefer pasteurized egg whites for added safety.
While not a health food, peppermint meringues can be enjoyed as an occasional indulgence. Peppermint itself has mild digestive benefits and may help soothe nausea, though the amount in extract form here is minimal.
Ingredients
- 4 large egg whites (room temperature)
- 1/2 teaspoon cream of tartar
- 1 cup (200g) granulated sugar
- 1/2 to 1 teaspoon pure peppermint extract (adjust to taste)
- Red or pink gel food coloring (a small amount)
- 2–3 tablespoons crushed candy canes (optional, for texture and garnish)
Directions
- Preheat oven to 225°F (107°C). Line two baking sheets with parchment paper or silicone mats. Optionally, trace 1.5-inch circles as piping guides.
- In a clean, dry bowl, beat egg whites on medium speed until frothy (about 1 minute).
- Add cream of tartar and continue beating until soft peaks form.
- Gradually add sugar, one tablespoon at a time, beating well after each addition. Increase speed to high and whip until stiff, glossy peaks form (about 5–7 minutes).
- Reduce speed to low. Add peppermint extract and mix briefly until incorporated.
- Remove one-third of the meringue to a separate bowl. Add red gel food coloring and mix until evenly tinted.
- Spoon the colored meringue back into the main bowl in blobs. Gently fold 2–3 times to create a marbled effect.
- If using, gently fold in crushed candy canes.
- Transfer mixture to a piping bag with a round or star tip. Pipe small mounds onto prepared sheets, spacing them 1 inch apart.
- Bake one sheet at a time for 1 hour and 15 minutes, rotating halfway through.
- After baking, turn off the oven and let meringues cool inside with the door slightly ajar for 30–60 minutes.
- Once completely cooled, gently peel off parchment. Store in an airtight container at room temperature.
FAQ
Can I make peppermint meringues without food coloring?
Yes! You can make plain white peppermint meringues. They’ll still taste delicious and festive, especially if topped with crushed candy canes.
Why did my meringues crack or collapse?
This usually happens due to rapid temperature changes, underbeating egg whites, or opening the oven too soon. Ensure stable heat and allow slow cooling.
How long do peppermint meringues last?
Stored in an airtight container in a cool, dry place, they can last up to 2 weeks. Humidity is their enemy!
Can I freeze peppermint meringues?
Yes, they freeze exceptionally well. Layer them in a freezer-safe container with parchment between layers. Thaw at room temperature for 30 minutes before serving.
Can I use liquid food coloring?
Liquid coloring can introduce excess moisture and weaken the meringue structure. Gel or paste colors are strongly recommended.
Are peppermint meringues safe for kids?
Absolutely! Kids love the sweet, minty flavor and fun appearance. Just ensure crushed candy canes are finely ground to avoid choking hazards for younger children.
Can I make these without candy canes?
Definitely. The recipe works beautifully without them. You can substitute with mini chocolate chips, nuts, or leave them plain for a minimalist look.
Summary
Peppermint meringues are a festive, crunchy, and delightfully minty treat that brings holiday cheer to any table. Easy to make and endlessly customizable, they’re the perfect balance of elegance and whimsy.