Introduction
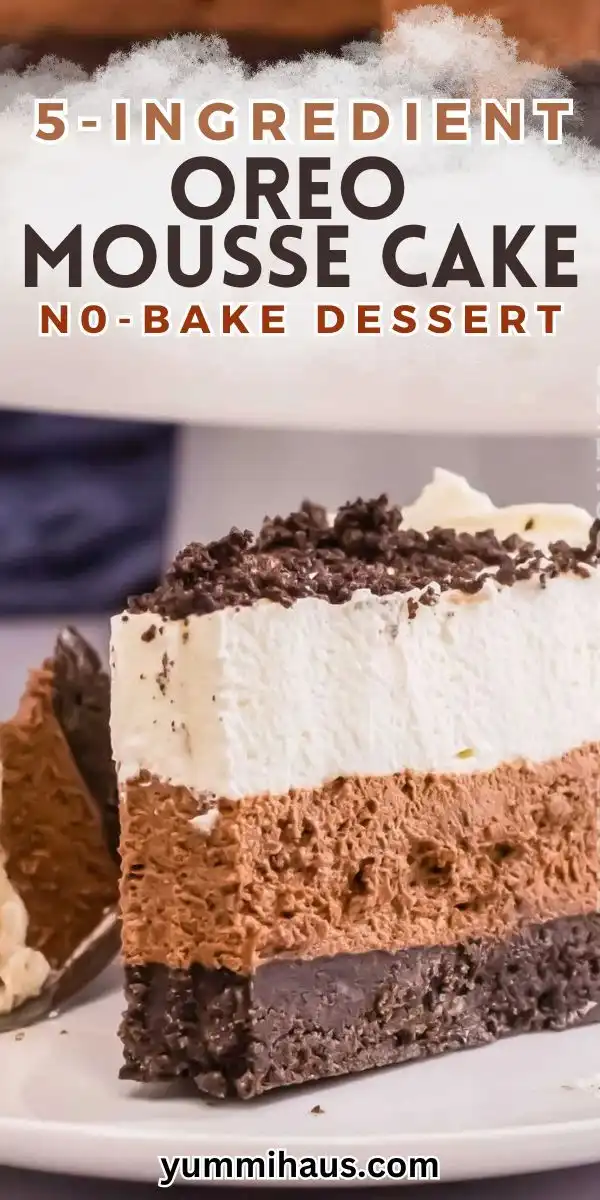
Welcome to the decadent, dreamy, and delightfully effortless world of the No-Bake Oreo Mousse Cake—a showstopping dessert that marries the nostalgic crunch of Oreos with the cloud-like silkiness of chilled mousse, all without turning on your oven. Whether you’re a seasoned home baker or a complete beginner, this recipe is designed for success: no baking, no tempering, no complicated techniques—just layers of rich chocolatey flavor, creamy texture, and irresistible cookie magic. Perfect for summer potlucks, holiday gatherings, last-minute dinner parties, or even a well-deserved solo treat after a long day, this cake delivers restaurant-quality elegance with pantry-friendly simplicity. Its stunning visual appeal—deep cocoa layers, snowy white mousse peaks, and dramatic Oreo garnishes—belies how incredibly approachable it is to make. In fact, many first-timers report being stunned by how professional their finished cake looks—and tastes.
The History
While the exact origin of the No-Bake Oreo Mousse Cake remains undocumented in culinary archives, its evolution is a delicious reflection of mid-to-late 20th-century American dessert culture. The Oreo cookie itself debuted in 1912 by the National Biscuit Company (later Nabisco), quickly becoming an icon of American snack culture. By the 1950s and ’60s, “no-bake” desserts surged in popularity—driven by convenience, the rise of refrigerators in every home, and the growing appeal of chilled, set desserts like Jell-O molds, cheesecakes, and pudding pies. Early versions of Oreo-based no-bake treats appeared in community cookbooks and women’s magazines as “Oreo Refrigerator Pie” or “Oreo Dream Dessert”—often featuring crushed cookies mixed into whipped topping or cream cheese fillings. The modern mousse cake iteration gained traction in the 2000s and 2010s alongside the food blogging boom and social media’s obsession with photogenic, layered desserts. Influencers and home cooks began experimenting with stabilized whipped cream, gelatin-infused mousses, and elegant layering techniques—transforming humble ingredients into multi-tiered masterpieces. Today, the No-Bake Oreo Mousse Cake stands as a beloved hybrid: honoring classic American comfort while embracing contemporary presentation standards, global dessert trends (like Japanese-style light mousses), and dietary flexibility (with countless vegan, gluten-free, and low-sugar adaptations flourishing online).
Ingredients Breakdown
Understanding *why* each ingredient matters—not just *what* goes in—is key to mastering this dessert. Below is a meticulous, chef-level breakdown of every component and its functional role:
- Oreo Cookies (Standard, Original): Not just for flavor—their high cocoa content, balanced sweetness, and proprietary oil-and-sugar blend provide structure, richness, and emulsification when blended into crumbs. Their iconic “creme” filling contributes natural stabilizers (hydrogenated oils, corn syrup) that help bind the crust and enhance mouthfeel. Note: Double Stuf works but yields a softer, sweeter crust; Mint or Golden Oreos alter flavor profiles significantly and may require adjustments to complementary elements (e.g., mint extract in mousse).
- Unsalted Butter (Melted): Acts as the essential binder for the crust. Its fat content coats crumbs evenly, enabling firm yet tender compression. Unsalted ensures precise control over sodium levels—critical when balancing the inherent saltiness of Oreos. Clarified butter can be used for a purer chocolate note and higher melt resistance.
- Heavy Whipping Cream (36–40% fat): The backbone of the mousse. High fat content ensures stability, volume, and luxurious richness when whipped. Lower-fat alternatives (half-and-half, whole milk) will not hold peaks and will weep or separate. Cold cream (chilled bowl & beaters) is non-negotiable for optimal aeration and stiffness.
- Full-Fat Cream Cheese (Room Temperature): Adds tang, body, and structural integrity to the mousse. Its acidity cuts through sweetness, while its proteins and fats help stabilize the airy whipped cream. Low-fat or whipped cream cheese contains stabilizers and air that compromise smoothness and cause graininess or collapse. Letting it soften fully prevents lumps and ensures seamless incorporation.
- Powdered Sugar (Confectioners’ Sugar): Contains ~3% cornstarch—a built-in stabilizer that helps prevent weeping and supports texture. Its fine granulation dissolves instantly, unlike granulated sugar which can create grittiness or destabilize foam. Sifting before use eliminates clumps that could sabotage smooth mousse.
- Pure Vanilla Extract: Enhances complexity and rounds out chocolate notes. Alcohol-based extracts (not imitation) carry volatile aromatic compounds that elevate the entire sensory experience. Madagascar Bourbon vanilla offers warm, caramelized depth; Mexican vanilla adds spicier, earthier tones.
- High-Quality Cocoa Powder (Dutch-Processed Preferred): Provides deep, smooth chocolate intensity without bitterness. Dutch-processed cocoa is alkalized, yielding richer color, milder acidity, and superior solubility—crucial for lump-free mousse. Natural cocoa works but may require pH balancing (e.g., pinch of baking soda) and yields sharper, fruitier notes.
- Unflavored Gelatin (or Agar-Agar for Vegan): The invisible architect of stability. When properly bloomed and dissolved, gelatin forms a delicate thermoreversible network that “locks in” air bubbles, prevents syneresis (weeping), and allows clean slicing—even after 5+ days refrigeration. Agar-agar (derived from seaweed) serves the same purpose for plant-based versions but requires boiling activation and sets firmer/colder.
- Whole Milk (for Blooming Gelatin): Provides hydration and mild acidity to aid gelatin dispersion. Warm (not hot) milk ensures gentle, even dissolution without denaturing proteins.
- Pinch of Fine Sea Salt: A secret weapon—it doesn’t make the dessert taste salty but heightens sweetness perception, balances fat, and amplifies all other flavors through contrast. Kosher salt’s larger crystals can leave detectable grains; fine sea salt integrates seamlessly.
Pro Tip: Ingredient temperature is as vital as selection. Cold cream + room-temp cream cheese + slightly warm gelatin mixture = perfect emulsion. Deviations cause splitting, graininess, or failure to set.
Step-by-Step Recipe
- Prepare the Crust (30 minutes ahead): Pulse 24 full-size Oreos (about 2 cups crumbs) in a food processor until uniformly fine—no large shards. Transfer to a bowl, add 6 tbsp melted unsalted butter and ¼ tsp fine sea salt. Mix with a fork until all crumbs are evenly moistened and resemble wet sand. Press firmly into the bottom and 1 inch up the sides of a 9-inch springform pan using the back of a measuring cup or flat-bottomed glass. Aim for ¼-inch thickness, ensuring even coverage and no gaps. Refrigerate uncovered for at least 30 minutes (or freeze for 15) to fully set.
- Bloom the Gelatin: In a small heatproof bowl, sprinkle 1½ tsp unflavored gelatin over 3 tbsp cold whole milk. Let sit undisturbed for 5 minutes until thickened and spongy (“bloomed”). Meanwhile, heat 2 tbsp additional milk in a small saucepan over low heat until steaming (110–120°F)—do not boil. Pour hot milk over bloomed gelatin and whisk vigorously for 30 seconds until completely smooth and clear. Set aside to cool slightly (2 minutes)—it should remain liquid but no longer hot to touch.
- Make the Chocolate Base Layer: Sift ⅓ cup Dutch-process cocoa powder and ¼ cup powdered sugar into a medium bowl. Whisk in 2 tbsp cold whole milk until smooth and glossy—no lumps! Stir in the cooled gelatin mixture until fully incorporated. Set aside.
- Whip the Cream Cheese Base: In a large chilled bowl, beat 8 oz full-fat cream cheese (room temp) with an electric mixer on medium for 1 minute until creamy and smooth. Gradually add ½ cup powdered sugar, 1 tsp vanilla, and ¼ tsp salt. Beat 2 more minutes until light and fluffy—scrape bowl thoroughly. Reduce speed to low and slowly drizzle in the cooled cocoa-gelatin mixture. Mix just until combined—do not overbeat.
- Whip the Cream: In another large chilled bowl, pour 2 cups cold heavy whipping cream. Whip on medium-high with chilled beaters until soft peaks form (about 2 minutes). Increase speed to high and whip just until stiff, glossy peaks hold firmly—do not overwhip into butter.
- Fold & Layer (The Critical Step): Using a large silicone spatula, add one-third of the whipped cream to the cream cheese mixture. Gently fold with 10–12 slow, deliberate strokes—cut down center, sweep along bottom, and lift up and over—until mostly combined. Repeat twice more with remaining cream, folding minimally each time until *just* uniform. Overmixing deflates air and causes dense texture. Pour mixture into chilled crust. Smooth top with offset spatula. Tap pan sharply on counter 3 times to release air bubbles.
- Chill to Set (Non-Negotiable Timing): Cover loosely with plastic wrap (touching surface to prevent skin). Refrigerate for *minimum* 6 hours—but ideally 12–16 hours—for full gelatin polymerization, clean sliceability, and flavor melding. Overnight is strongly recommended.
- Garnish & Serve: Run a thin knife under hot water, dry thoroughly, and gently loosen cake edges. Release springform collar. Top with generous swirls of extra whipped cream, crumbled Oreos (reserve some for rim), chocolate shavings, and optional mint leaves. Serve chilled with a warm, damp knife for pristine slices.
Tips
- Chill Everything—Twice: Refrigerate mixing bowls, beaters, cream, and even your springform pan for 15–20 minutes before starting. Cold tools trap more air and yield stiffer, longer-lasting peaks.
- Whip Cream in Batches if Needed: If your mixer struggles with 2 cups at once, whip in two 1-cup batches—fold together gently before adding to cream cheese base.
- Test Gelatin Temperature: Before adding to cream cheese, dip a clean finger in gelatin mixture—it should feel warm, not hot. Heat >130°F can cook egg proteins (if using) or destabilize fats.
- Folding Technique Matters: Rotate bowl a quarter-turn after each fold. Use wide, shallow strokes—not deep plunges—to preserve volume. Stop when you see *no streaks*, not when it looks “perfectly smooth.”
- Crust Compression is Key: Press crumbs with upward pressure against pan sides to create a seamless, tall barrier that prevents mousse seepage and gives clean vertical slices.
- Avoid Condensation: If storing overnight, place cake on a wire rack inside fridge (not sealed container) to allow airflow and prevent moisture buildup on surface.
- Slice Like a Pro: Dip knife in hot water, wipe dry, and cut with steady downward pressure—no sawing. Wipe and reheat between every slice.
- Rescue Split Mousse: If mixture appears curdled during folding, immediately place bowl over ice water and stir vigorously for 30 seconds—it often re-emulsifies.
- Prevent Oreo Bleeding: For stark black-and-white contrast, use only the cookie wafers (discard creme) when garnishing—or chill crumbles separately so they don’t soften on mousse.
- Room-Temp Cream Cheese Hack: Cut into ½-inch cubes and microwave at 50% power for 12 seconds. Check; repeat only if needed. Never microwave in block form.
Variations and Customizations
This recipe is a versatile canvas—here’s how to personalize it while preserving texture and structure:
- Double Chocolate: Add 2 tbsp finely grated dark chocolate (70% cacao) to the cocoa-sugar mixture before adding milk. Or fold in ½ cup mini chocolate chips (tempered or chopped baking bar) into mousse before layering.
- Mint Oreo: Replace vanilla with ¼ tsp pure peppermint extract (add with gelatin mixture) and garnish with crushed Mint Oreos + fresh mint. Reduce cocoa to 3 tbsp to balance mint’s coolness.
- Peanut Butter Swirl: After pouring mousse, drizzle ⅓ cup warmed, smooth peanut butter (no added oil) in zigzags. Drag a toothpick through to create marbling—don’t overmix.
- Espresso Kick: Dissolve 1½ tsp instant espresso powder into the warm milk for blooming gelatin. Enhances chocolate depth without overt coffee flavor.
- Gluten-Free: Use certified GF Oreos (like Kinnikinnick or Glutino) and verify all other ingredients (vanilla, cocoa, powdered sugar). Texture remains identical.
- Vegan: Substitute: GF Oreos + coconut oil (melted) for crust; full-fat coconut cream (chilled overnight, solid part only) + silken tofu + maple syrup for mousse base; agar-agar (1 tsp boiled in 3 tbsp water) for gelatin. Chill 8+ hours.
- Low-Sugar/Keto: Use keto Oreos (e.g., Lenny & Larry’s) or homemade almond flour cookies; replace powdered sugar with erythritol-monk fruit blend (sifted); use full-fat cream cheese and heavy cream. Add ¼ tsp xanthan gum to mousse for stability.
- Layered Rainbow: Divide mousse into 3 bowls. Color one with 2 drops pink food gel, one with blue, leave one natural. Spoon alternating dollops into crust and marble lightly.
- Mini Individual Cakes: Use 4 oz mason jars or ramekins. Reduce chill time to 4 hours. Garnish with single Oreo half per jar.
- Boozy Upgrade: Add 1 tbsp Kahlúa, Baileys, or bourbon to gelatin mixture. Reduces setting time slightly—chill 8+ hours.
Health Considerations and Nutritional Value
While undeniably indulgent, mindful preparation can enhance nutritional balance without sacrificing joy. Here’s a realistic, science-backed perspective per standard slice (1/12 of 9-inch cake):
- Calories & Macros: Approx. 380–420 kcal/slice. Fat: 28–32g (mostly unsaturated from cocoa butter and cream), Carbs: 32–36g (of which 22–26g sugars—primarily from Oreos and powdered sugar), Protein: 5–7g (from cream cheese and dairy). Not low-calorie, but nutrient-dense for dessert—rich in calcium, vitamin A, and healthy fats that support satiety.
- Sugar Awareness: One slice contains ~2.5 tsp added sugar. To reduce: Use ⅓ less powdered sugar (compensate with 1 tsp vanilla or pinch of cinnamon), choose reduced-sugar Oreos, or swap 25% cream cheese for Greek yogurt (adds protein, reduces fat/sugar).
- Dairy Considerations: Contains lactose. Lactose-free heavy cream and cream cheese exist (cultured to break down lactose) and work identically. Always check Oreo labels—original U.S. Oreos are accidentally vegan (no dairy), but international versions may contain whey.
- Allergen Notes: Contains wheat (gluten), soy (in Oreos and some cream cheeses), dairy, and eggs (if using gelatin derived from bovine sources—though most supermarket gelatin is pork-based; check label). Tree nuts are not present unless added via variations (e.g., peanut butter).
- Heart Health: Cocoa flavonoids may support vascular function—but benefits require high-flavanol, minimally processed cocoa. Dutch-processed retains significant antioxidants despite alkalization. Pairing with berries (garnish) boosts polyphenols.
- Gut-Friendly Tweaks: Add 1 tbsp ground flaxseed or chia seeds to crust for soluble fiber. Probiotic-rich cream cheese (e.g., Green Valley) adds live cultures—verify “live & active cultures” label.
- Portion Mindfulness: Serving size matters. This cake’s richness naturally encourages slower, more intentional eating—enhancing satisfaction with smaller portions. A 2-inch slice feels deeply satisfying.
- Not a “Health Food”—But Not “Junk” Either: Unlike highly processed snack cakes, this uses whole-food fats, minimal refined starches, and zero artificial preservatives. It’s a celebration food—best enjoyed mindfully, occasionally, and as part of a varied diet.
Ingredients
- 24 original Oreo cookies (about 2 cups finely crushed)
- 6 tablespoons unsalted butter, melted
- ¼ teaspoon fine sea salt
- 2 cups heavy whipping cream (cold)
- 8 ounces full-fat brick-style cream cheese, softened to room temperature
- ¾ cup powdered sugar, sifted
- 1 teaspoon pure vanilla extract
- ⅓ cup Dutch-process cocoa powder, sifted
- 1½ teaspoons unflavored gelatin
- 5 tablespoons whole milk, divided (3 tbsp cold + 2 tbsp warmed)
- Additional Oreos, whipped cream, and chocolate shavings for garnish
Directions
- Grease a 9-inch springform pan and line the bottom with parchment paper. Set aside.
- In a food processor, pulse Oreos until fine crumbs form (about 30 seconds). Transfer to a bowl; stir in melted butter and salt until mixture resembles wet sand. Press firmly into prepared pan, covering bottom and climbing 1 inch up sides. Refrigerate for 30 minutes.
- In a small bowl, sprinkle gelatin over 3 tbsp cold milk. Let bloom 5 minutes. Meanwhile, heat remaining 2 tbsp milk in a saucepan until steaming (110–120°F). Pour over bloomed gelatin; whisk 30 seconds until clear. Cool 2 minutes.
- In another bowl, sift cocoa and ¼ cup powdered sugar. Whisk in 2 tbsp cold milk until smooth. Stir in cooled gelatin mixture.
- In a large bowl, beat cream cheese until smooth (1 min). Add remaining ½ cup powdered sugar, vanilla, and salt; beat 2 mins until fluffy. On low, mix in cocoa-gelatin mixture until just combined.
- In a separate chilled bowl, whip cream to stiff peaks. Fold one-third into cream cheese base to lighten, then gently fold in remainder until uniform—do not overmix.
- Pour into chilled crust. Smooth top. Tap pan sharply on counter 3 times. Cover with plastic wrap touching surface.
- Refrigerate minimum 6 hours, ideally 12–16 hours.
- To serve: Run warm knife around edge, release springform, peel off parchment. Garnish generously. Slice with warm, dry knife.
FAQ
- Can I make this ahead?
- Absolutely—this cake improves with time. It keeps beautifully for up to 5 days refrigerated. Flavor deepens, textures harmonize, and slices become cleaner. Freeze (unfrosted) for up to 2 months: wrap tightly in plastic + foil. Thaw overnight in fridge before serving.
- Why did my mousse get grainy?
- Most common causes: cream cheese wasn’t fully softened (lumps won’t dissolve), gelatin was too hot when added (cooked fats), or cream was overwhipped then overfolded. Next time, ensure cream cheese is truly room temp, gelatin is warm-not-hot, and fold with minimal strokes.
- Can I use Cool Whip instead of whipping cream?
- Not recommended. Cool Whip contains gums, emulsifiers, and air that destabilize the mousse’s structure, leading to weeping, iciness, or collapse. Real cream provides superior mouthfeel and stability.
- My crust is crumbly—how do I fix it?
- Too little butter or uneven pressing. Next time, increase butter to 7 tbsp. Press *very* firmly using straight-down pressure first, then upward along sides. Chill longer before filling.
- Can I omit the gelatin?
- You can—but expect softer texture, shorter fridge life (max 2 days), and potential weeping. For gelatin-free stability: add 1 tbsp cornstarch to cocoa mixture (cook gently with milk until thickened, then cool) OR use 4 oz extra cream cheese.
- Why does my cake shrink away from the pan?
- Condensation during chilling. Always cover with plastic wrap that touches the surface—or chill uncovered for first 2 hours, then cover. Also, ensure crust is fully chilled before filling.
- Can I use a different pan size?
- Yes—with adjustments: 8-inch pan = increase all ingredients by 25% and chill 18+ hours. 7-inch = reduce by 20%; chill 10+ hours. For 9×13 pan, double recipe and chill 24 hours—cut into bars.
- How do I prevent Oreo crumbs from bleeding into mousse?
- Chill garnishes separately until serving. Or use only the chocolate wafers (discard creme filling) for topping—they’re drier and less prone to smudging.
- Is there a way to make it lighter?
- Yes: replace half the cream cheese with 4 oz drained, blended silken tofu (adds protein, cuts fat), use 1% milk in gelatin, and whip cream to soft peaks only. Expect slight texture change—still delicious!
- Can kids help make this?
- Perfect for young bakers! They can crush Oreos (in a ziplock with rolling pin), press crust, sift dry ingredients, and fold in whipped cream. Supervise gelatin heating and electric mixer use.
Summary
The No-Bake Oreo Mousse Cake is a masterclass in effortless elegance—combining crisp, buttery Oreo crust with luxuriously airy, chocolate-kissed mousse—all without heat, hassle, or compromise on flavor or texture.
With smart substitutions, mindful tweaks, and pro techniques baked into every step, it’s a dessert that delights beginners and impresses experts alike, proving that the most memorable treats are often the simplest to create.