Introduction
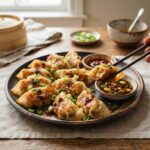
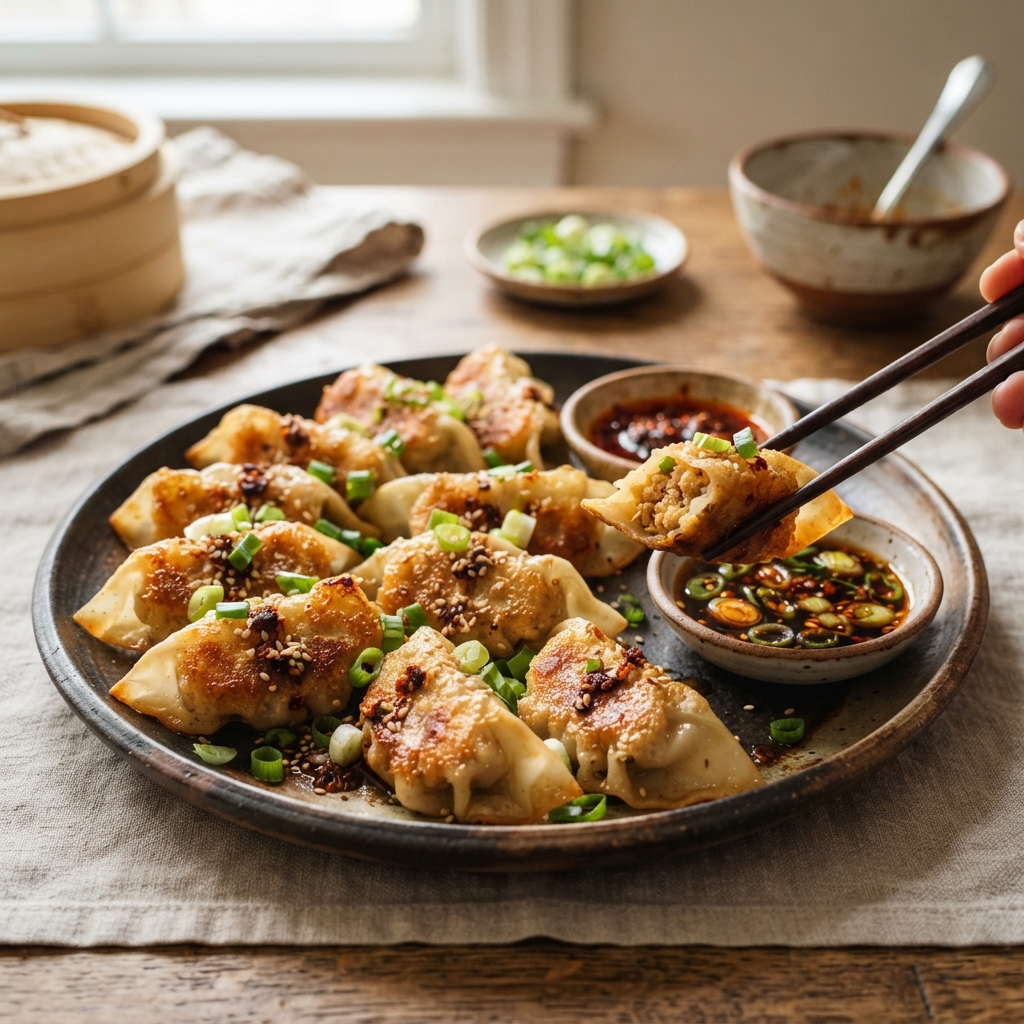
Welcome to the ultimate culinary fusion experience that marries the comforting, doughy embrace of traditional dumplings with the irresistible crunch of Southern-style fried chicken. Fried Chicken Dumplings Crispy Bite is not merely a dish; it is a textural symphony designed to delight the senses of even the most discerning food enthusiasts. Imagine biting into a golden, shatteringly crisp exterior that gives way to a tender, juicy chicken filling encased in a delicate wrapper. This recipe transcends cultural boundaries, bringing together the art of Asian dumpling making with the bold, seasoned flair of American fried chicken. Whether you are hosting a game day party, looking for an impressive appetizer for a dinner gathering, or simply craving a unique twist on comfort food, this dish delivers satisfaction in every single bite. The complexity of flavors lies in the careful layering of spices within the chicken mixture and the precise technique used to achieve that perfect golden-brown crust without absorbing excessive oil. Prepare yourself to elevate your cooking repertoire with a recipe that promises to become a staple in your household.
The History
To truly appreciate the Fried Chicken Dumplings Crispy Bite, one must delve into the rich historical tapestries of its two primary components. Dumplings, known variously as jiaozi, gyoza, or potstickers, have a lineage stretching back thousands of years to ancient China, originally created as a way to wrap medicinal herbs within dough before evolving into a beloved culinary staple across Asia and Europe. Conversely, fried chicken has deep roots in the Southern United States, where Scottish immigrants and West African culinary traditions merged to create the seasoned, deep-fried poultry dish known globally today. The fusion of these two distinct culinary icons is a relatively modern phenomenon, born out of the contemporary gastropub movement and the global trend of cross-cultural experimentation in the kitchen. Chefs began experimenting with the idea of encapsulating fried chicken flavors within a portable dough vessel, aiming to create a handheld delicacy that offered the best of both worlds. This dish represents the modern era of cooking, where boundaries are blurred, and innovation is driven by the desire to create novel textures and heightened flavor profiles that honor tradition while pushing creative limits.
Ingredients Breakdown
Understanding the role of each component is crucial for mastering this recipe. The dough serves as the structural foundation; we utilize a combination of all-purpose flour and a small amount of cornstarch to ensure the wrapper remains tender yet sturdy enough to hold the filling during the frying process. The chicken filling is the heart of the dish; using ground chicken thigh meat is preferred over breast meat because the higher fat content ensures moisture and juiciness after frying, preventing the interior from becoming dry. The seasoning blend is where the “fried chicken” identity shines, incorporating paprika, garlic powder, onion powder, and a hint of cayenne for warmth. For the coating, we employ a triple-dip method involving flour, egg wash, and panko breadcrumbs. Panko is essential here as its larger flake structure creates more surface area for crunch compared to traditional fine breadcrumbs. Finally, the frying oil must have a high smoke point; peanut oil or canola oil is ideal because it allows the dumplings to fry at high temperatures without burning, ensuring a crisp exterior while cooking the interior thoroughly.
Step-by-Step Recipe
Creating these dumplings requires patience and attention to detail, but the process is deeply rewarding. Phase one involves preparing the dough; mix your dry ingredients and gradually incorporate warm water until a smooth ball forms, then let it rest covered for at least thirty minutes to relax the gluten. Phase two focuses on the filling; combine the ground chicken with your spice blend, minced aromatics like ginger and scallions, and a binding agent such as a beaten egg or cornstarch slurry to keep the juices locked in. Phase three is the assembly; roll out the dough into thin circles, place a modest amount of filling in the center, and pleat the edges tightly to seal, ensuring no air pockets remain which could cause bursting during frying. Phase four is the coating station; set up three bowls for flour, egg wash, and panko, dipping each sealed dumpling sequentially to build a robust crust. Phase five is the frying; heat your oil to exactly 350 degrees Fahrenheit and fry the dumplings in small batches to maintain temperature, turning them occasionally until they achieve a uniform deep golden hue. Drain them immediately on a wire rack to preserve crispiness.
Tips
- Oil Temperature Control: Invest in a deep-fry thermometer. If the oil is too cool, the dumplings will absorb grease and become soggy; if too hot, the outside will burn before the chicken inside is cooked.
- Sealing Technique: Use a small brush of water along the edges of the dough wrapper before pleating. This acts as a glue to ensure a tight seal that won’t open up under the stress of hot oil.
- Double Fry Method: For an extra crunchy bite, consider frying the dumplings once until lightly golden, removing them to cool, and then frying them again for a minute just before serving. This technique drives out moisture from the crust.
- Don’t Overcrowd: Frying too many dumplings at once drops the oil temperature drastically. Give them plenty of space to float and cook evenly.
- Rest the Dough: Never skip the resting period for the dough. Rested dough is more elastic and easier to roll thin without snapping back, resulting in a lighter wrapper.
Variations and Customizations
The beauty of this recipe lies in its adaptability to suit various palates and dietary needs. For those who enjoy heat, you can incorporate chopped jalapeños or a dash of Sichuan peppercorn oil into the chicken filling to add a numbing spice profile. Cheese lovers might experiment by adding small cubes of cheddar or mozzarella into the center of the filling, creating a molten core when bitten into. For a gluten-free option, substitute the all-purpose flour with a high-quality gluten-free baking blend and use cornstarch for the coating instead of wheat flour. If you are looking to reduce fat intake, these dumplings can be air-fried; simply spray them generously with oil and cook at 400 degrees Fahrenheit, though the texture will be slightly less shattering than deep-fried versions. You can also experiment with the protein source, swapping chicken for ground pork, turkey, or even a plant-based meat alternative for a vegetarian twist while maintaining the crispy coating technique.
Health Considerations and Nutritional Value
While undeniably delicious, it is important to approach this dish with an understanding of its nutritional profile. As a deep-fried item, the calorie count will be higher than steamed or boiled dumplings, primarily due to the oil absorption in the breadcrumb coating. However, the chicken filling provides a substantial source of lean protein, essential for muscle repair and satiety. To make the dish healthier, you can increase the ratio of vegetables in the filling, such as finely minced cabbage or carrots, to add fiber and vitamins without adding calories. Choosing to bake or air fry instead of deep frying can significantly reduce the total fat content. Additionally, using whole wheat flour for the wrapper can increase the fiber content, making the dish more digestible and providing a slower release of energy. Moderation is key; enjoying these as an occasional treat or part of a balanced meal with a side of steamed vegetables or a fresh salad can help mitigate the heavier aspects of the fried coating.
Ingredients
- For the Dough: 2 cups all-purpose flour, 1/4 cup cornstarch, 3/4 cup warm water, 1/2 teaspoon salt.
- For the Filling: 1 lb ground chicken thighs, 2 cloves garlic minced, 1 inch ginger grated, 2 scallions chopped, 1 tablespoon soy sauce, 1 teaspoon sesame oil, 1/2 teaspoon black pepper.
- For the Fried Chicken Coating: 1 cup all-purpose flour, 2 teaspoons paprika, 1 teaspoon garlic powder, 1 teaspoon onion powder, 1/2 teaspoon cayenne pepper, 2 eggs beaten, 2 cups panko breadcrumbs.
- For Frying: 4 cups peanut or canola oil.
Directions
- In a large bowl, mix the dough ingredients until a smooth ball forms. Cover and let rest for 30 minutes.
- Combine all filling ingredients in a bowl and mix thoroughly until the mixture becomes slightly sticky.
- Roll the dough into small circles, approximately 3 inches in diameter.
- Place a spoonful of filling in the center of each wrapper and pleat the edges to seal tightly.
- Prepare three stations: flour mixed with spices, beaten eggs, and panko breadcrumbs.
- Dip each dumpling into the flour, then the egg, and finally press firmly into the panko to coat.
- Heat oil in a deep pot to 350°F (175°C).
- Fry dumplings in batches for 4-5 minutes until golden brown and floating.
- Remove and drain on a wire rack before serving immediately.
FAQ
Can I make these ahead of time?
Yes, you can assemble and coat the dumplings up to 24 hours in advance. Store them in the refrigerator on a baking sheet lined with parchment paper, covered loosely with plastic wrap, until you are ready to fry.
How do I store leftovers?
Leftovers should be stored in an airtight container in the refrigerator for up to two days. Reheat them in an oven or air fryer to restore crispiness, as microwaving will make the coating soggy.
Can I freeze these dumplings?
Absolutely. Freeze the uncooked, coated dumplings on a tray until solid, then transfer to a freezer bag. You can fry them directly from frozen, adding an extra minute or two to the cooking time.
What dipping sauce goes best?
A spicy honey sauce, classic ranch, or a soy-vinegar ginger dip complements the rich flavors of the fried chicken filling perfectly.
Summary
Fried Chicken Dumplings Crispy Bite offers a perfect fusion of juicy seasoned chicken and a shatteringly crisp coating wrapped in tender dough.
Follow the detailed steps for temperature control and sealing to ensure a golden, delicious result every time you cook.